 Save to Pinterest
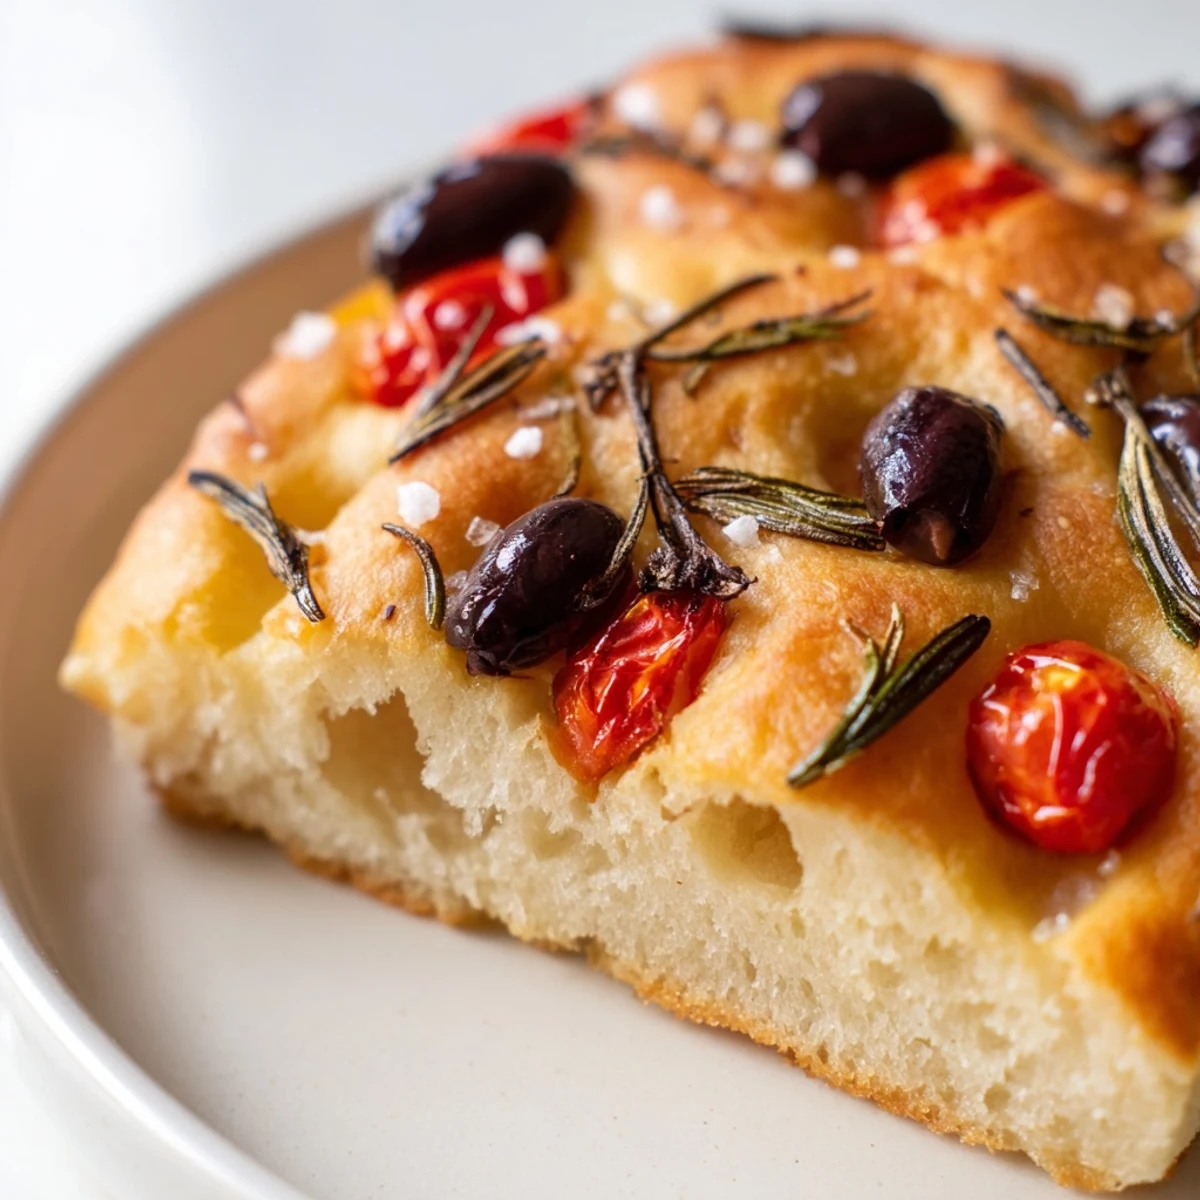
 These golden mini focaccias deliver the perfect balance of textures—crisp, caramelized exterior giving way to an airy, fragrant crumb. The dough requires just 20 minutes of active preparation, followed by a leisurely rise that develops depth of flavor. Each hand-formed round gets generously dimpled, brushed with extra-virgin olive oil, and showered with flaky sea salt, fresh rosemary, and optional cherry tomatoes or olives.
Baked at high heat, they emerge with a beautifully bronzed, crackly surface and tender interior. The result is an irresistible Italian bread that's ideal for entertaining, pairing with soups, or enjoying simply as a warm snack. The recipe easily doubles for gatherings.
The first time I made mini focaccia, my kitchen smelled like an Italian bakery and I could not stop eating them warm from the oven. My roommate wandered in, drawn by the rosemary and olive oil scent, and we stood at the counter popping them into our mouths straight from the baking sheet. Now whenever I have people over, these are the first thing to disappear.
Last summer I made these for a dinner party and my friend Sarah, who swears she cannot bake anything, asked for the recipe before she even finished her first one. The dimpled tops with rosemary and sea salt look so impressive but take literally seconds to do. I love watching people's faces when they break one open and see the steam rising.
Ingredients
- All-purpose flour: Creates the perfect structure for these pillowy little breads without being too dense.
- Lukewarm water: Activates the yeast and should feel like bath temperature, about 105°F.
- Active dry yeast: Make sure it bubbles and foams during proofing, or your dough will not rise properly.
- Fine sea salt: Enhances flavor and strengthens the gluten structure for better texture.
- Extra-virgin olive oil: Use the good stuff here since it really shines in the final flavor.
- Sugar: Feeds the yeast and helps achieve that beautiful golden color in the oven.
- Flaky sea salt: The finishing salt that creates those incredible salty bursts on top.
- Fresh rosemary: Woody and aromatic, it pairs perfectly with the olive oil crust.
- Cherry tomatoes: Roasted tomato flavor takes these to another level but is completely optional.
- Black olives: Add briny, savory bites throughout the bread if you want extra dimension.
Instructions
- Wake up the yeast:
- Combine the lukewarm water, sugar, and yeast in a large bowl and let it sit for 5 minutes until foamy and alive.
- Mix the dough:
- Add flour, salt, and 1 tablespoon olive oil to the yeast mixture, mixing until a sticky dough forms that pulls away from the sides.
- Knead it out:
- Turn the dough onto a floured surface and knead for 5 to 7 minutes until smooth, elastic, and slightly tacky but not sticking to your hands.
- Let it rise:
- Place dough in an oiled bowl, cover with a damp cloth, and let rise in a warm spot for 1 hour until doubled in size.
- Heat things up:
- Preheat your oven to 425°F and line a baking sheet with parchment paper while you shape the dough.
- Shape the minis:
- Punch down the risen dough, divide into 8 equal pieces, and shape each into small rounds or ovals on the prepared sheet.
- Make those dimples:
- Use your fingertips to press deep dimples all over each round, then brush generously with olive oil.
- Add the toppings:
- Sprinkle with flaky sea salt, chopped rosemary, and press in cherry tomatoes and olives if using.
- Bake to golden:
- Bake for 18 to 20 minutes until deeply golden with a crispy, crackled crust on top.
- Warm moments:
- Let them cool for just a few minutes before serving, because they are irresistible warm.
 Save to Pinterest
 These became my go-to contribution for potlucks after the time I arrived with a basket and people literally gathered around me as I set them down. There is something so satisfying about pulling one apart and seeing that perfect hole structure inside. My nephew now requests them every time he visits, and he is the pickiest eater I know.
Getting the Perfect Rise
I have found that the warmest spot in my kitchen is right on top of the refrigerator, which gives the most consistent rise every time. If your house is drafty, you can create a little proofing box by heating a mug of water in the microwave, then placing the dough inside with the door closed. The yeast will reward you with the most beautiful puffy dough you have ever seen.
Topping Ideas Beyond the Basics
Sundried tomatoes and grated Parmesan create this incredibly savory, almost pizza like flavor that everyone loves. Sometimes I do caramelized onions and thyme for a sweeter, more mellow version that pairs beautifully with soup. The toppings are limited only by your imagination and what you have in your pantry.
Make Ahead and Storage
You can make the dough the night before and let it do a slow rise in the refrigerator, which actually develops even better flavor. Just bring it to room temperature for about 30 minutes before shaping and baking.
- Store leftover focaccia in a paper bag to maintain that crispy crust.
- Reheat in a 350°F oven for 5 minutes to bring back the freshly baked texture.
- They freeze beautifully and reheat surprisingly well for quick snacks later.
 Save to Pinterest
 There is nothing quite like the sound of these crackling as they come out of the oven. I hope they become a staple in your kitchen like they have in mine.
Recipe FAQs
- → Why is my focaccia dense instead of fluffy?
-
Dense focaccia usually results from under-kneading or insufficient rising time. Knead the dough for at least 5–7 minutes until smooth and elastic. Allow the dough to double in size during the rise, and avoid over-handling when shaping the individual rounds.
- → Can I prepare the dough ahead of time?
-
Yes, after the initial rise, punch down the dough and refrigerate it for up to 24 hours. Bring to room temperature before shaping and baking. This extended resting actually enhances flavor development.
- → What's the purpose of dimpling the dough?
-
Dimpling creates small pockets that trap olive oil, ensuring crispy, flavorful crust areas. It also helps the focaccia maintain its airy texture by preventing excessive rising, creating that characteristic bubbly appearance.
- → How do I store and reheat leftovers?
-
Store cooled mini focaccias in an airtight container for up to 2 days. For longer storage, freeze individually wrapped. Reheat in a 350°F oven for 5–7 minutes to restore crispiness. Avoid microwaving, which makes them chewy.
- → Can I use different herbs and toppings?
-
Absolutely. Try thyme, oregano, or sage instead of rosemary. Caramelized onions, roasted garlic, grated Parmesan, or sun-dried tomatoes all work beautifully. Just avoid watery toppings that could make the bottom soggy.
- → Why does my focaccia lack crispy bottom?
-
Ensure your oven is fully preheated to 425°F before baking. For extra bottom crispiness, use a baking stone preheated for at least 30 minutes. Baking directly on the hot stone mimics a professional bread oven.
