 Save to Pinterest
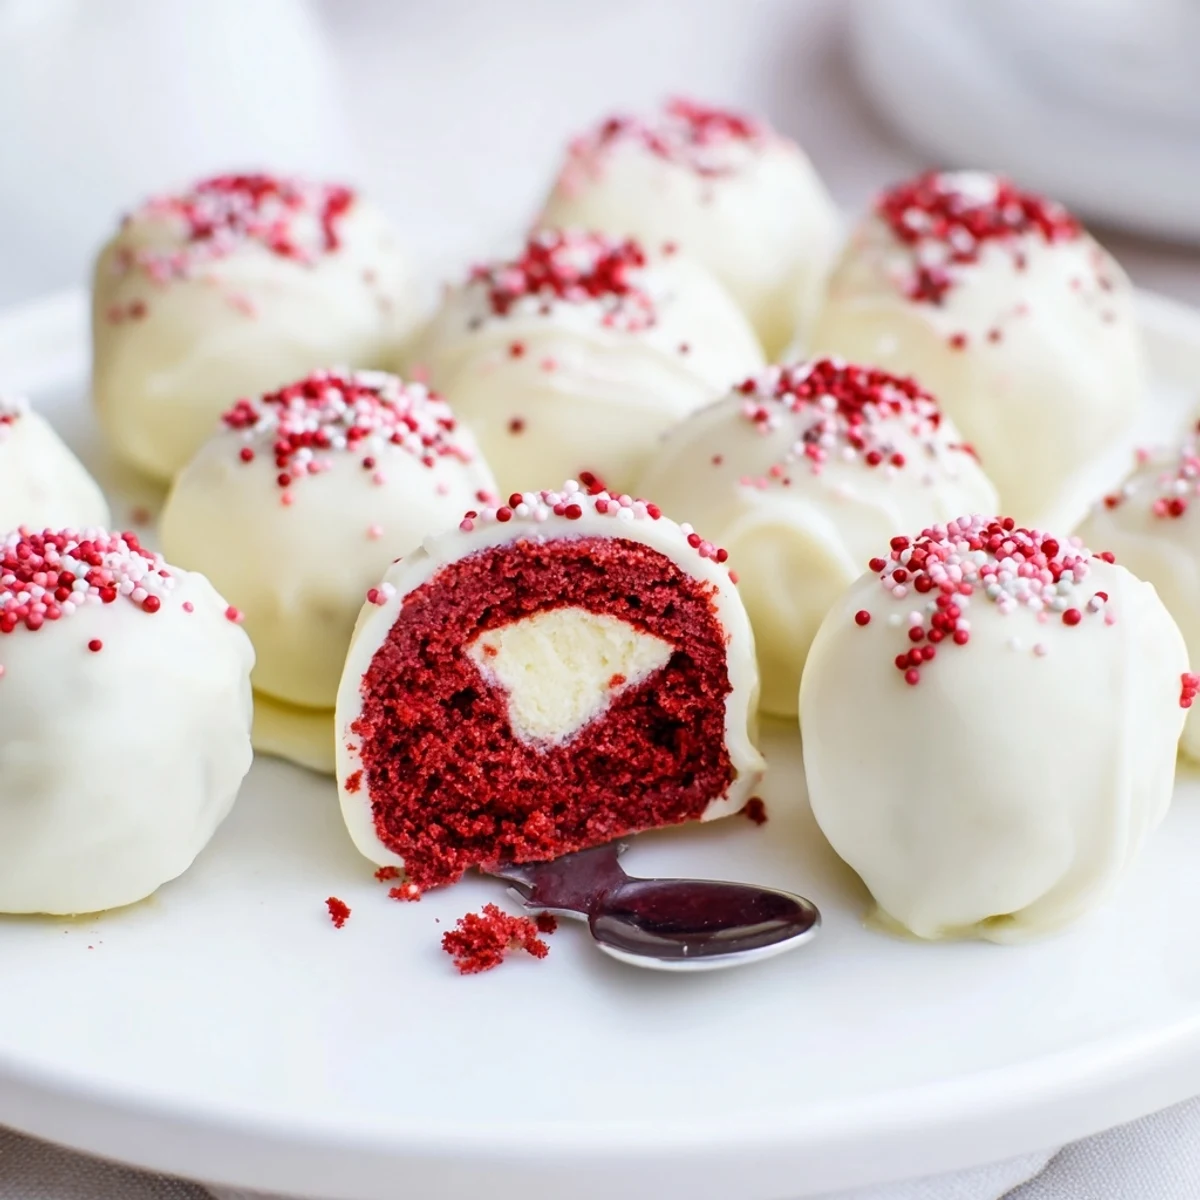
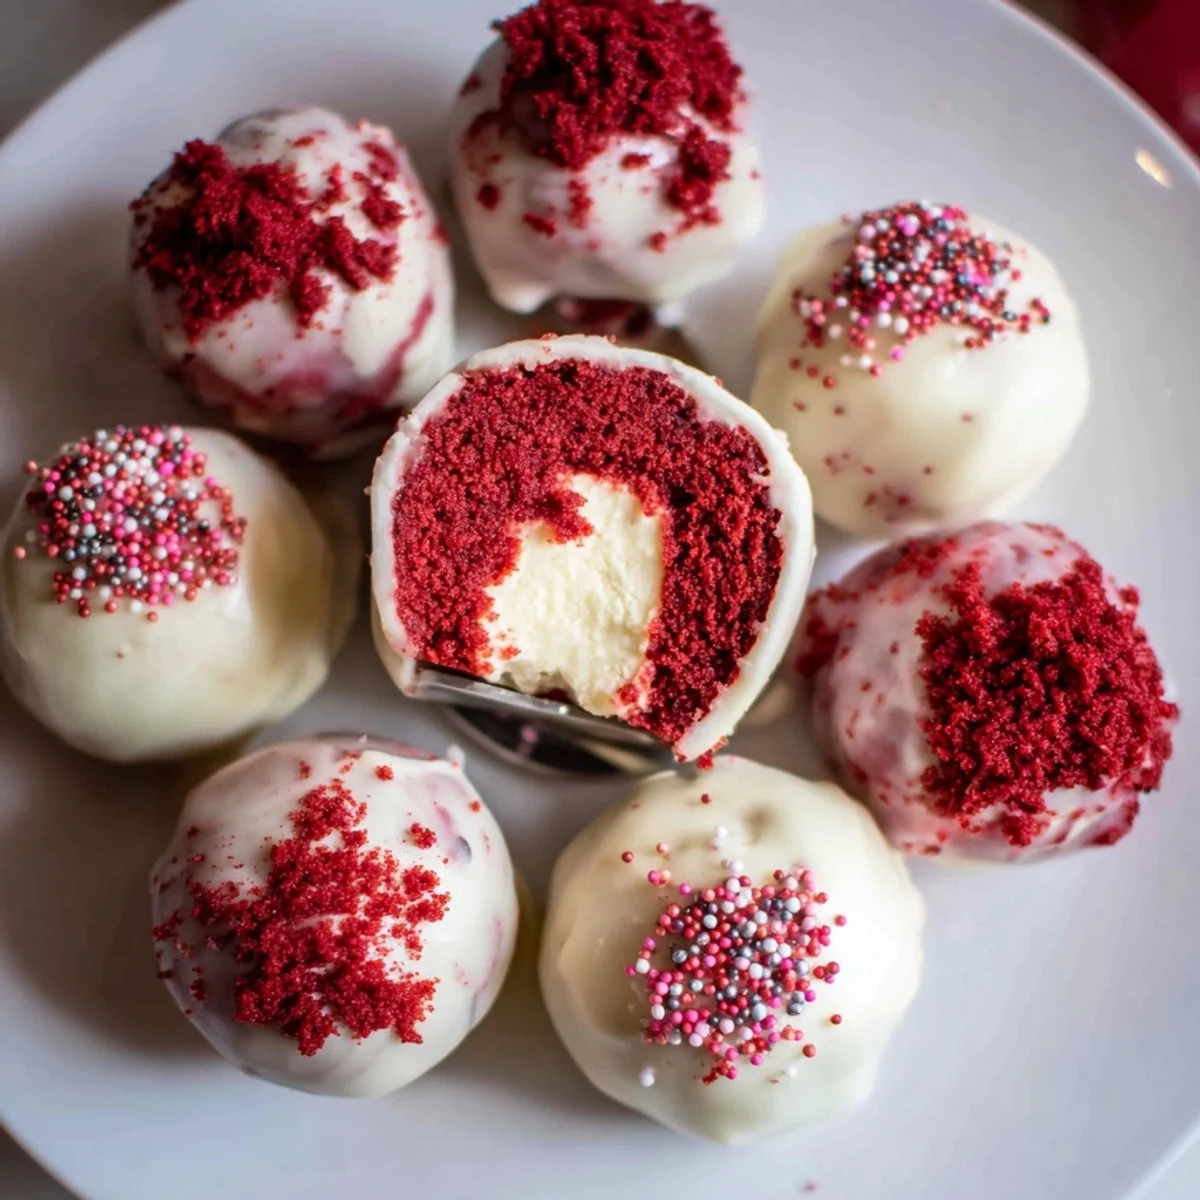
 Red Velvet Cheesecake Balls meld crumbled red velvet cake with softened cream cheese and powdered sugar into a pliable filling. Scoop small portions, chill until firm, then dip each ball in melted chocolate and let the coating set. Decorate with crumbs or sprinkles. Variations include using dark chocolate, adding nuts or coconut to the filling, or coloring the coating for a festive finish.
The smell of red velvet anything has a way of pulling people into the kitchen before you even announce dessert is ready, and these little cheesecake stuffed bites are no exception. I stumbled onto the idea during a holiday party prep panic when I had leftover cake and cream cheese but zero patience for frosting layers. What started as a desperate fridge raid turned into the most requested contribution to every gathering since. They vanish from plates faster than anything else I have ever made.
My friend Laura ate four of them standing at the counter before she even took her coat off, which I consider the highest compliment a dessert can receive. I had made them for a book club meeting and by the time everyone arrived there were only half left, and I had to pretend I had always planned a smaller batch. Now she texts me every few weeks hinting that book club should meet more often, and I know exactly what she is really asking for.
Ingredients
- 300 g red velvet cake: Fully baked and cooled, either homemade or a good quality store bought loaf works beautifully here.
- 200 g cream cheese: Softened to room temperature so it blends without lumps, and full fat makes a noticeable difference in creaminess.
- 40 g powdered sugar: Just enough to sweeten the filling without making it cloying or loose.
- 1 tsp vanilla extract: Use pure extract if you can because the flavor carries through the cream cheese in a way imitation simply cannot match.
- 250 g white chocolate: Choose a brand that lists cocoa butter as an ingredient for the smoothest melt and best setting behavior.
- Red food coloring (optional): A couple of drops stirred into the melted white chocolate gives a lovely pinkish red coating.
- Red velvet crumbs and sprinkles: Save a handful of cake crumbs before mixing for rolling, and sprinkles add a party ready finish.
Instructions
- Break down the cake:
- Crumble the red velvet cake into a large bowl using your fingers, working until you have uniform fine crumbs with no large chunks hiding anywhere. The texture should resemble damp sand that wants to hold together when you squeeze it gently.
- Whip the filling:
- Beat the softened cream cheese, powdered sugar, and vanilla together until completely smooth and silky with no streaks remaining. Taste it here because this is the moment to decide if you want it slightly sweeter before moving forward.
- Bring it all together:
- Pour the cream cheese mixture over the crumbs and stir with a spatula, then switch to your hands and knead until every crumb is coated and the mixture feels like a soft pliable dough. If it feels too wet, chill it for ten minutes before rolling.
- Roll into balls:
- Use a tablespoon or small cookie scoop to portion the dough evenly, then roll each one between your palms applying gentle even pressure until perfectly round. Place them on a parchment lined tray with a little space between each one.
- Chill thoroughly:
- Refrigerate the tray for at least one full hour so the balls firm up enough to handle the dipping without collapsing or shedding crumbs into your chocolate.
- Melt the chocolate:
- Heat the white chocolate in a microwave safe bowl in twenty second bursts, stirring between each one, or use a double boiler for more gentle control over the consistency. Stir in red food coloring drop by drop if using, aiming for a shade you love.
- Dip and coat:
- Drop a chilled ball into the chocolate, roll it gently with a fork to coat completely, then lift it out tapping the fork against the bowl edge so excess drips away cleanly. Return each coated ball to the parchment and work quickly before the shell sets.
- Decorate while wet:
- Sprinkle your reserved crumbs or colorful sprinkles over each ball immediately after dipping because the window for adhesion closes fast once that chocolate begins to firm. Less is more here or you lose the clean look.
- Let them set:
- Leave the finished balls at cool room temperature or pop them back in the fridge for fifteen minutes until the coating is completely firm to the touch and no longer tacky anywhere.
 Save to Pinterest
 There is something about handing someone a tiny, perfectly coated truffle on a cold evening that makes the whole room feel warmer and more festive. These little bites have a way of turning a random Tuesday into something that feels celebrated.
Choosing Your Chocolate
White chocolate gives the classic contrast against the red interior, but dark chocolate creates a more sophisticated bitterness that balances the sweet cake beautifully. I have tried milk chocolate too and while it is delicious, it tends to be softer at room temperature so the balls lose their neat shape faster on a warm buffet table. Use whatever you enjoy most, just make sure it melts smoothly and contains real cocoa butter rather than palm oil substitutes.
Making Them Your Own
Crushed pecans or toasted coconut folded into the filling adds a welcome crunch that surprises people in the best way. A friend of mine rolls hers in crushed freeze dried strawberries instead of sprinkles and they look stunning on a dessert table with almost no extra effort. The base recipe is really a canvas, and once you have the rolling and dipping technique down the variations become almost endless.
Serving and Storing
Presentation matters with these because half the joy is the visual impact before anyone takes a bite, so arrange them on a clean white plate or in small paper cups for a party. They travel well if you keep them chilled in a cooler bag, which makes them an excellent contribution to potlucks where you cannot control the kitchen situation.
- Let them sit at room temperature for about ten minutes before serving so the filling softens to its best creamy texture.
- Freeze them in a single layer on a tray before transferring to a freezer bag for up to one month, then thaw in the refrigerator overnight.
- Always label them if serving at a gathering because the chocolate shell hides allergens that guests might not expect inside.
 Save to Pinterest
 Every time I make these I think about how the best recipes are the ones that feel like a small gift you get to give yourself first. Whip up a batch this weekend and watch how quickly an empty plate becomes your favorite compliment.
Recipe FAQs
- → Can I use store-bought red velvet cake?
-
Yes. Pre-baked store-bought cake works well—just ensure it's fully cooled before crumbling. A drier cake binds better with the cream cheese filling.
- → How do I keep the balls from falling apart?
-
Chill the formed balls for at least an hour so the filling firms up. If mixture is too loose, add a touch more cake crumbs or a small extra spoon of powdered sugar to tighten the texture.
- → Which chocolate is best for coating?
-
Use tempered chocolate, couverture, or candy melts for a smooth, firm shell. White chocolate can be used and tinted with oil-based color or candy color; dark or milk chocolate gives a richer contrast.
- → How can I color the chocolate coating red without seizing?
-
Avoid water-based food colors with chocolate. Use oil-based coloring, powdered color, or pre-colored candy melts to maintain a glossy, workable coating.
- → Can these be made ahead and stored?
-
Yes. Store in an airtight container in the refrigerator for up to 5 days. For longer storage, freeze on a tray until solid, then transfer to a sealed container and freeze up to 1 month; thaw in the fridge before serving.
- → Any allergy-friendly swaps?
-
For dairy-free versions, use plant-based cream cheese and dairy-free chocolate. Replace cake with a gluten-free red velvet loaf or crumb alternative to accommodate gluten sensitivities.
