 Save to Pinterest
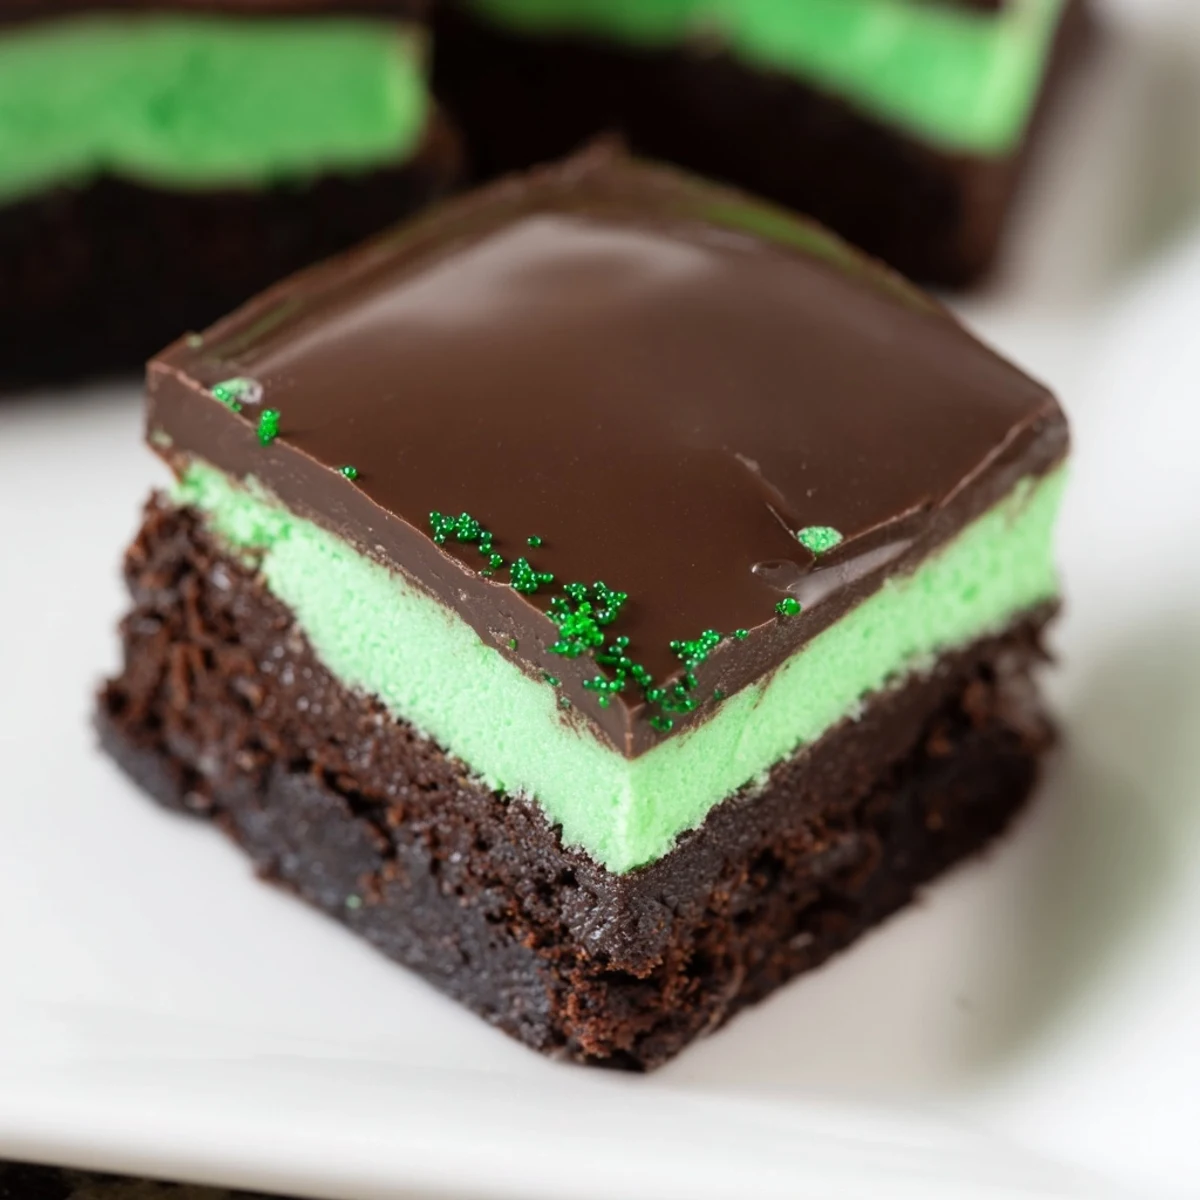
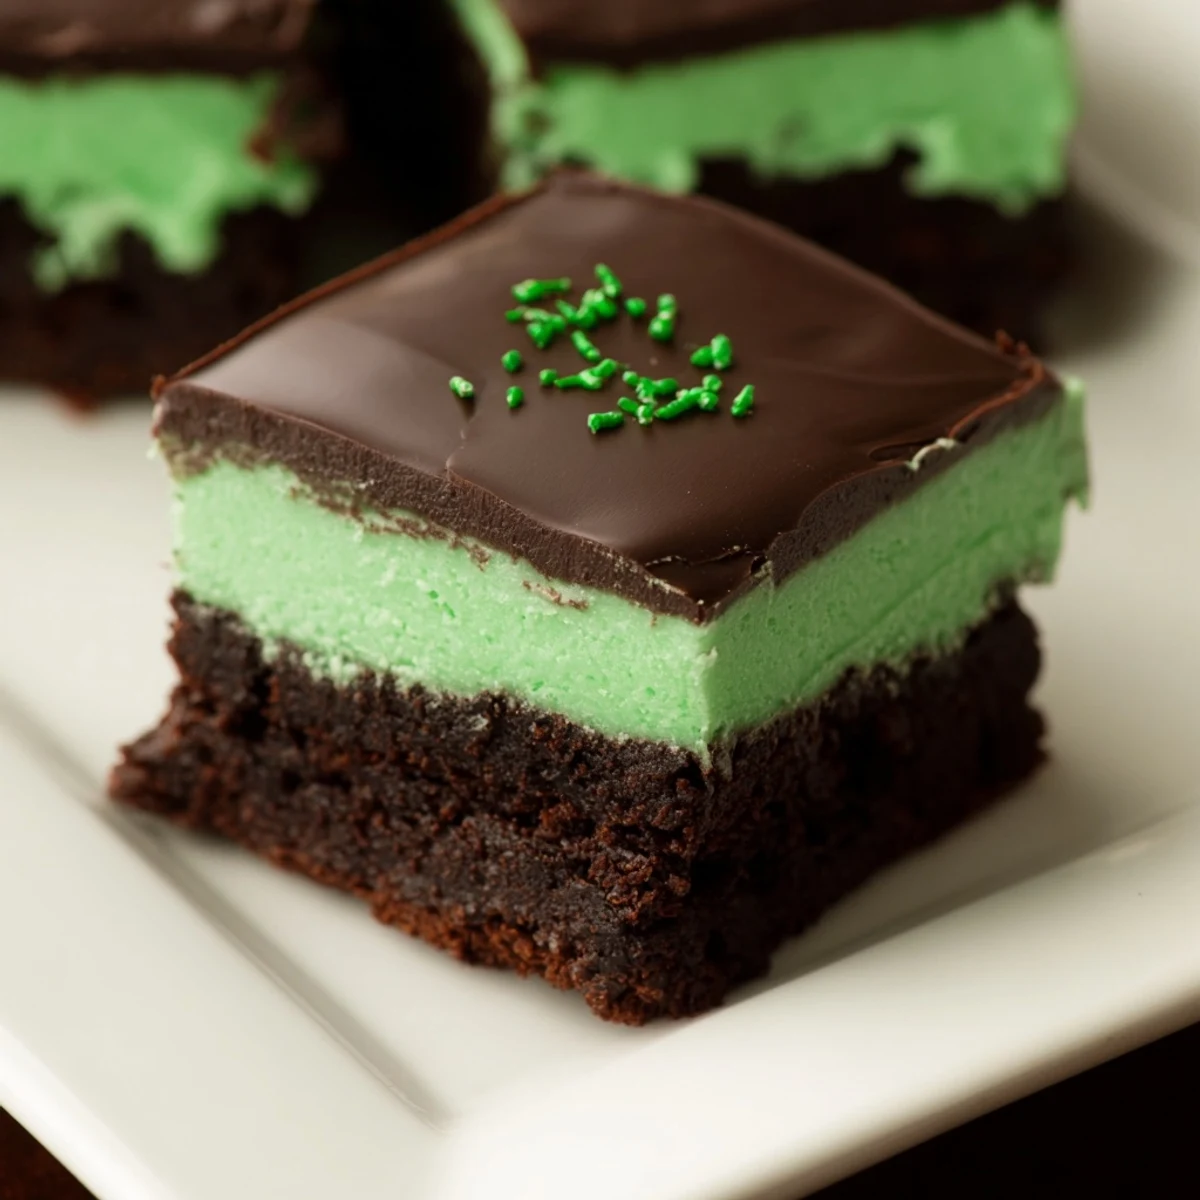
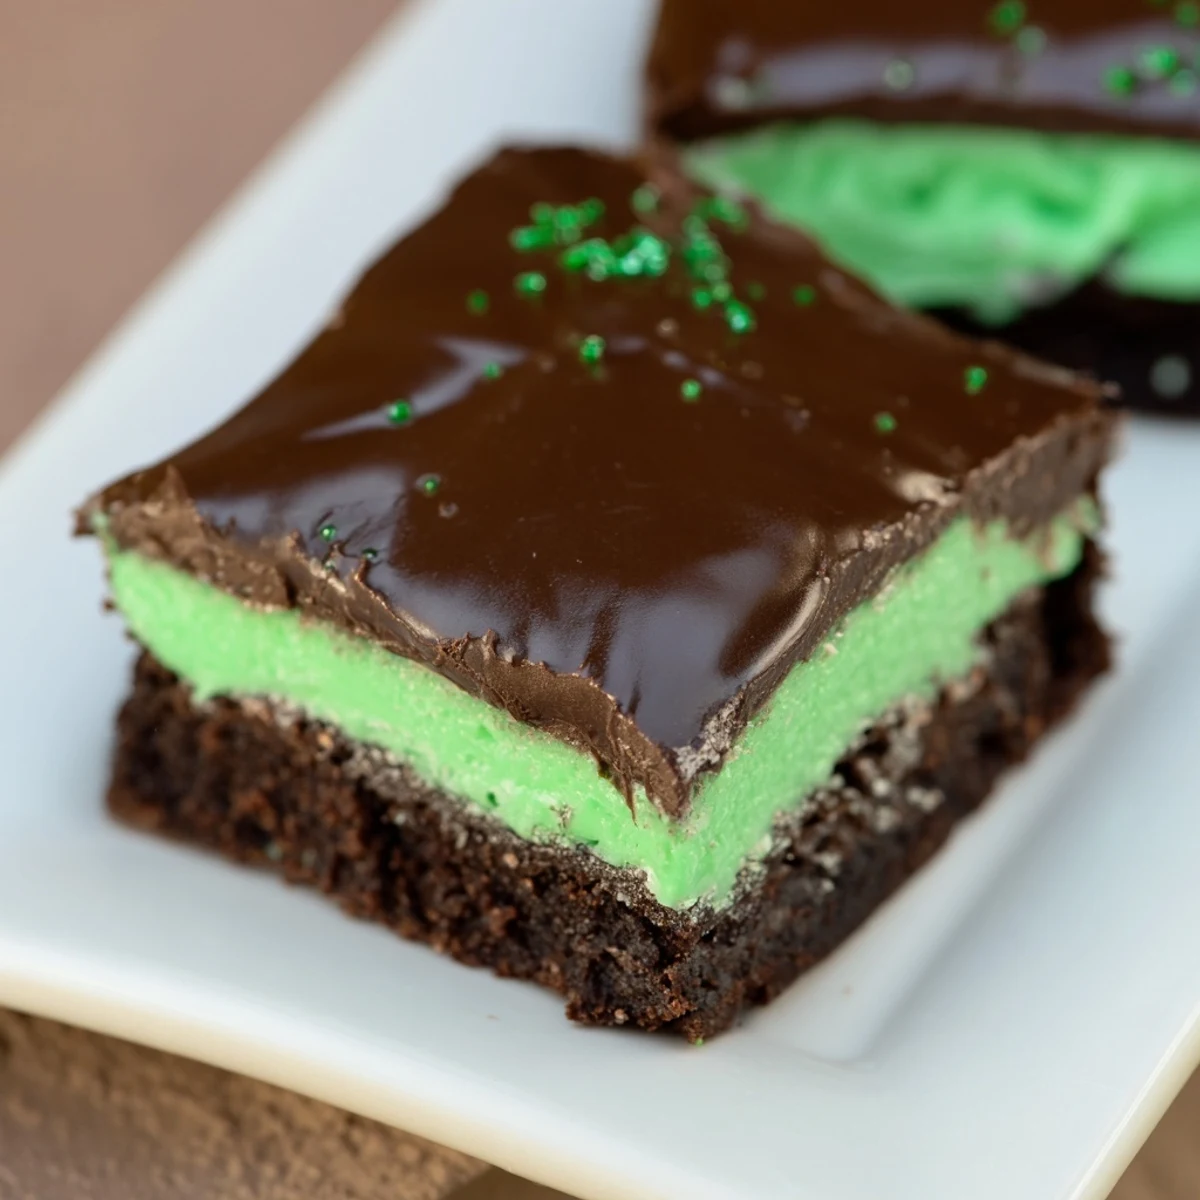
 Craft a decadent dessert perfect for St. Patrick's Day with these layered mint brownies. Begin with a rich, fudgy chocolate base, baked until just set with moist crumbs. Once cooled, spread a vibrant, creamy mint frosting, flavored with refreshing peppermint extract and tinted a festive green.
The ultimate indulgence is a smooth, glossy chocolate ganache, poured over the chilled mint layer and allowed to set. This combination of textures—dense brownie, airy frosting, and silky ganache—creates a truly memorable sweet. Prepare these ahead for an effortless holiday treat that promises a delightful blend of chocolate and mint flavors.
I remember the satisfying thud of chocolate hitting the double boiler, the rich, earthy scent filling my kitchen even before the mint joined the party. The idea of a brownie with layers just felt extra special, like a tiny edible celebration, even if it was a random Tuesday craving. It’s funny how a simple recipe can suddenly become a go-to for so many occasions, transforming an ordinary day into something festive. These St. Patrick&s;s Day Mint Brownies have certainly become one of those cherished recipes for me.
I recall a specific St. Patrick&s;s Day potluck years ago where these brownies were my contribution. I&s;d accidentally gotten a bit heavy-handed with the green food coloring for the frosting, resulting in a shade of emerald so vibrant it practically glowed in the dim party lights. Everyone joked they were “radioactive brownies,” but they vanished faster than anything else on the table, proving that sometimes, an accidental flourish just adds to the charm.
Ingredients
- Unsalted Butter: Using unsalted butter gives you control over the salt content, ensuring your brownies are perfectly balanced, not overly salty.
- Semisweet Chocolate, chopped: Chopping it finely helps it melt smoothly and evenly, preventing any stubborn lumps in your fudgy brownie base.
- Granulated Sugar: This sweetens the brownies beautifully and contributes to that signature crinkly top we all love.
- Large Eggs: Eggs are crucial for structure and richness, binding everything together into a tender, fudgy crumb.
- Vanilla Extract: A splash of good quality vanilla really deepens the chocolate flavor, adding a layer of warmth and complexity.
- All&s;Purpose Flour: Just enough flour to hold it all together without making the brownies cakey; we&s;re aiming for fudgy, not fluffy!
- Salt: A tiny pinch of salt enhances all the other flavors, especially the chocolate, making it taste even richer.
- Powdered Sugar: Essential for that super smooth, melt&s;in&s;your&s;mouth mint frosting; sift it if it&s;s lumpy for best results.
- Whole Milk: Adds creaminess to the frosting, helping achieve the perfect spreadable consistency.
- Pure Peppermint Extract: This is where the magic happens for that refreshing minty kick; ensure it&s;s "pure" for the best flavor, not "mint" which can sometimes taste like toothpaste.
- Green Food Coloring: Start with just a few drops and build up to your desired festive shade; a little goes a long way!
- Heavy Cream: The secret to a luscious, pourable ganache that sets beautifully on top of your mint layer.
Instructions
- Prepare Your Stage:
- Let&s;s get the oven warmed up to 175°C (350°F), and while it heats, line your 23x23 cm (9x9&s;inch) baking pan with parchment paper, leaving a slight overhang for easy removal later.
- Melt the Chocolate Dream:
- Nestle a heatproof bowl over a gently simmering pot of water, creating a double boiler, then add your butter and chopped semisweet chocolate for the brownie layer, stirring gently until it&s;s a smooth, glossy river of chocolate. Take it off the heat and let it cool down a bit &s; we don&s;t want to scramble the eggs!
- Sweet Whisking:
- Into that beautiful chocolate mix, whisk in the granulated sugar until it&s;s well combined, then crack in your eggs one at a time, beating thoroughly after each addition until everything is beautifully incorporated and glossy. Don&s;t forget that lovely teaspoon of vanilla extract!
- Fold in the Dry:
- Now, gently fold in the all&s;purpose flour and salt, using a light hand; mix just until you see no dry streaks, because overmixing means tough brownies, and we&s;re aiming for pure fudgy bliss.
- Bake to Perfection:
- Pour your rich brownie batter into the prepared pan, smoothing the top with a spatula, then slide it into the preheated oven for 30&s;35 minutes, or until a toothpick inserted into the center emerges with moist crumbs clinging to it &s; that&s;s the sign of a perfect brownie. Let it cool completely in the pan; patience is key here!
- Whip Up the Mint Frosting:
- In a separate bowl, beat your softened butter until it&s;s light and creamy, then gradually add the powdered sugar and whole milk, beating until the frosting is wonderfully smooth and fluffy. Stir in the pure peppermint extract and a few drops of green food coloring, adding more until you get that perfect St. Patrick&s;s Day hue.
- Layer and Chill:
- Spread that vibrant mint frosting evenly over your completely cooled brownie layer, making sure it reaches all the edges. Then, pop the whole pan into the refrigerator for about 20 minutes; this little chill time helps the frosting set nicely.
- Create the Glossy Ganache:
- For the ganache, gently heat the heavy cream in a small saucepan until it just begins to simmer around the edges. Pour this warm cream over your chopped semisweet chocolate and the extra tablespoon of butter in a heatproof bowl, letting it sit undisturbed for 2 minutes before stirring it gently until it transforms into a smooth, shiny, irresistible ganache.
- The Final Glaze:
- Carefully pour the warm, glossy ganache over the chilled mint layer, spreading it gently and evenly across the entire surface. Back into the refrigerator it goes for at least 30 minutes, or until that ganache layer is firm and beautifully set.
- Slice and Serve:
- Once everything is perfectly chilled and set, use those parchment paper overhangs to lift the whole slab of brownies from the pan. Now, with a sharp knife, cut them into 16 perfect squares. They&s;re wonderful served chilled, but also utterly delightful at room temperature!
 Save to Pinterest
 I remember bringing these to a family gathering where my young niece, usually a picky eater, took one look at the green layer and her eyes lit up like little Christmas lights. She called them "magic fairy brownies." It wasn&s;t just the taste, but the sheer joy of seeing her delight in something I had created that really made them special that day.
The Art of the Fudgy Brownie
Achieving that perfect fudgy brownie texture is all about gentle mixing; stop stirring as soon as the flour disappears to avoid developing too much gluten, which leads to a cakey rather than dense and rich brownie. The toothpick test is your best friend here &s; you want moist crumbs, not a clean stick. Trust the process, and you&s;ll be rewarded with ultimate fudginess.
Perfecting Your Layers
Each layer needs its moment to shine, and that often means a little patience with chilling. Letting the brownie cool completely prevents the mint frosting from melting, and chilling the frosting layer before adding the ganache ensures a crisp, distinct line between the green and brown. It&s;s like building a delicious edible skyscraper, where each level contributes to the overall structural integrity and visual appeal of your dessert.
Serving & Storing Your Masterpiece
These brownies are quite versatile. While they&s;re delightful straight from the fridge with their firm layers, letting them sit at room temperature for 15&s;20 minutes before serving allows the chocolate to soften slightly, enhancing their melt&s;in&s;your&s;mouth quality. They&s;re designed to be a showstopper, so don&s;t be afraid to let them shine.
- For an extra touch, a sprinkle of green sanding sugar or a few chocolate curls on top before the ganache sets completely can elevate their festive appeal.
- Use a warm, sharp knife for cleaner cuts; wiping it clean between slices helps maintain those beautiful layers.
- They keep beautifully in an airtight container in the refrigerator for up to 5 days, though I doubt they&s;ll last that long!
 Save to Pinterest
 So go ahead, whip up a batch of these glorious Mint Brownies. They&s;re more than just a dessert; they&s;re a little piece of edible joy, perfect for sharing and creating your own sweet memories.
Recipe FAQs
- → How do I ensure my brownies are fudgy and not cakey?
-
For the fudgiest texture, be careful not to overbake the brownie layer. A toothpick inserted should come out with moist crumbs, not completely clean. Also, allowing the brownies to cool completely before frosting helps maintain their dense, rich structure.
- → What's the secret to a vibrant green mint frosting?
-
Achieving the perfect festive green color involves adding green food coloring gradually, drop by drop, to the mint frosting until you reach your desired shade. Pure peppermint extract provides the authentic mint flavor, which you can adjust to your preference.
- → Can I prepare these mint brownies in advance?
-
Absolutely! These brownies are excellent for making ahead. You can prepare them a day in advance and store them covered in the refrigerator. This allows the layers to set properly, making them easier to cut and ensuring the flavors meld beautifully.
- → How do I achieve a perfectly smooth and glossy chocolate ganache?
-
The key to a smooth ganache is heating the heavy cream until just simmering, then pouring it over finely chopped chocolate and butter. Let it sit undisturbed for a couple of minutes to allow the heat to melt the chocolate before stirring gently until it's uniform and shiny.
- → What's the best way to cut clean squares?
-
For neat, even squares, ensure the brownies are thoroughly chilled before cutting. Use a large, sharp knife, warming it under hot water and wiping it clean between each cut. This prevents the layers from dragging and ensures clean edges.
