 Save to Pinterest
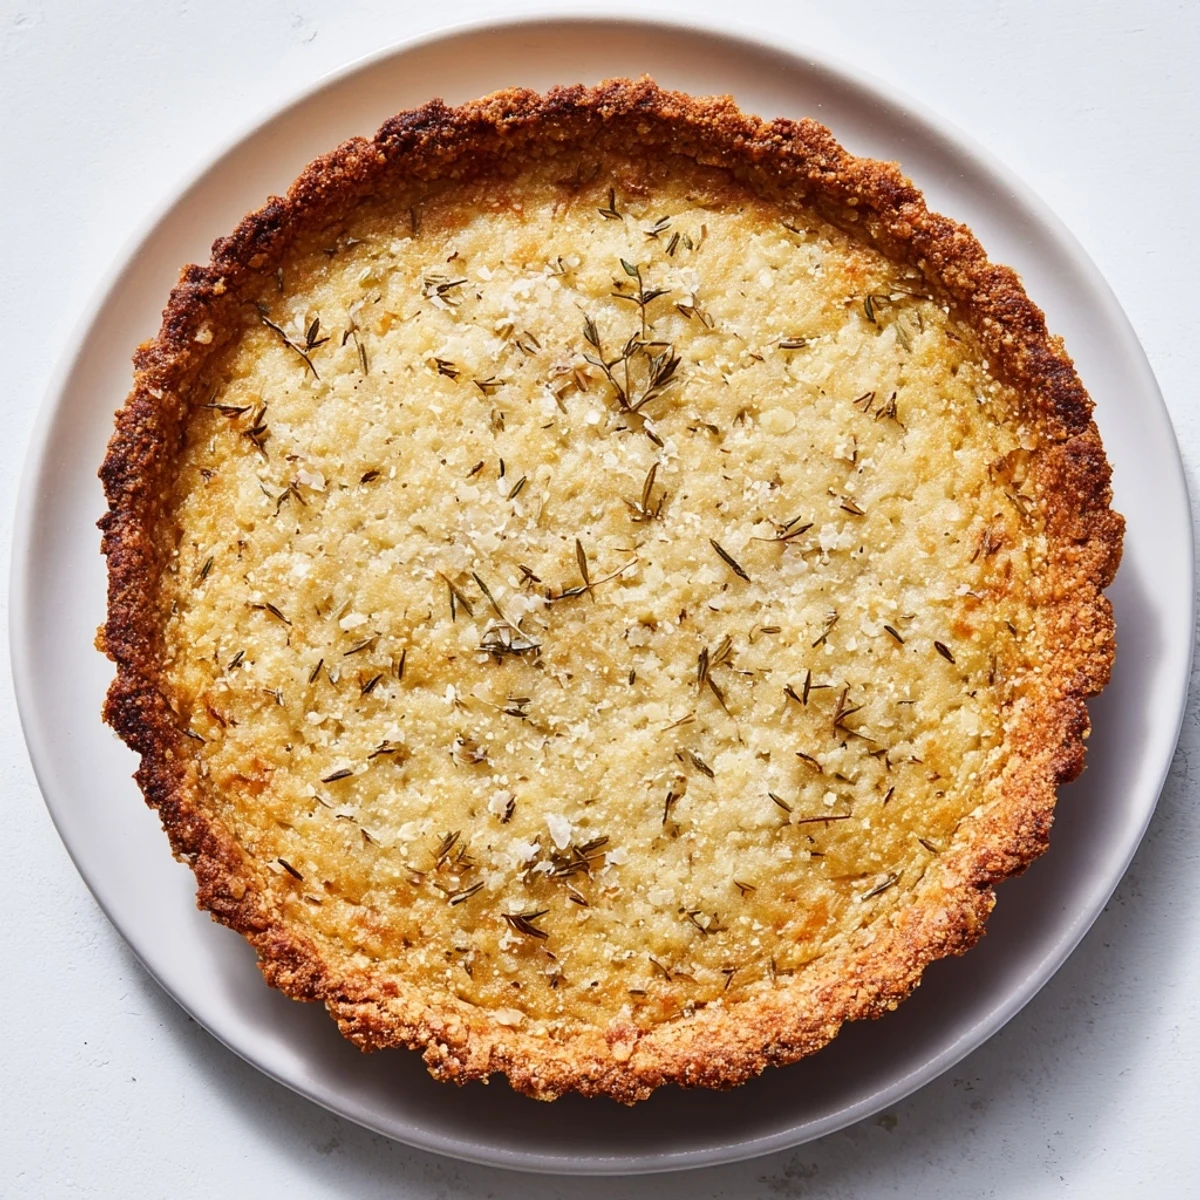
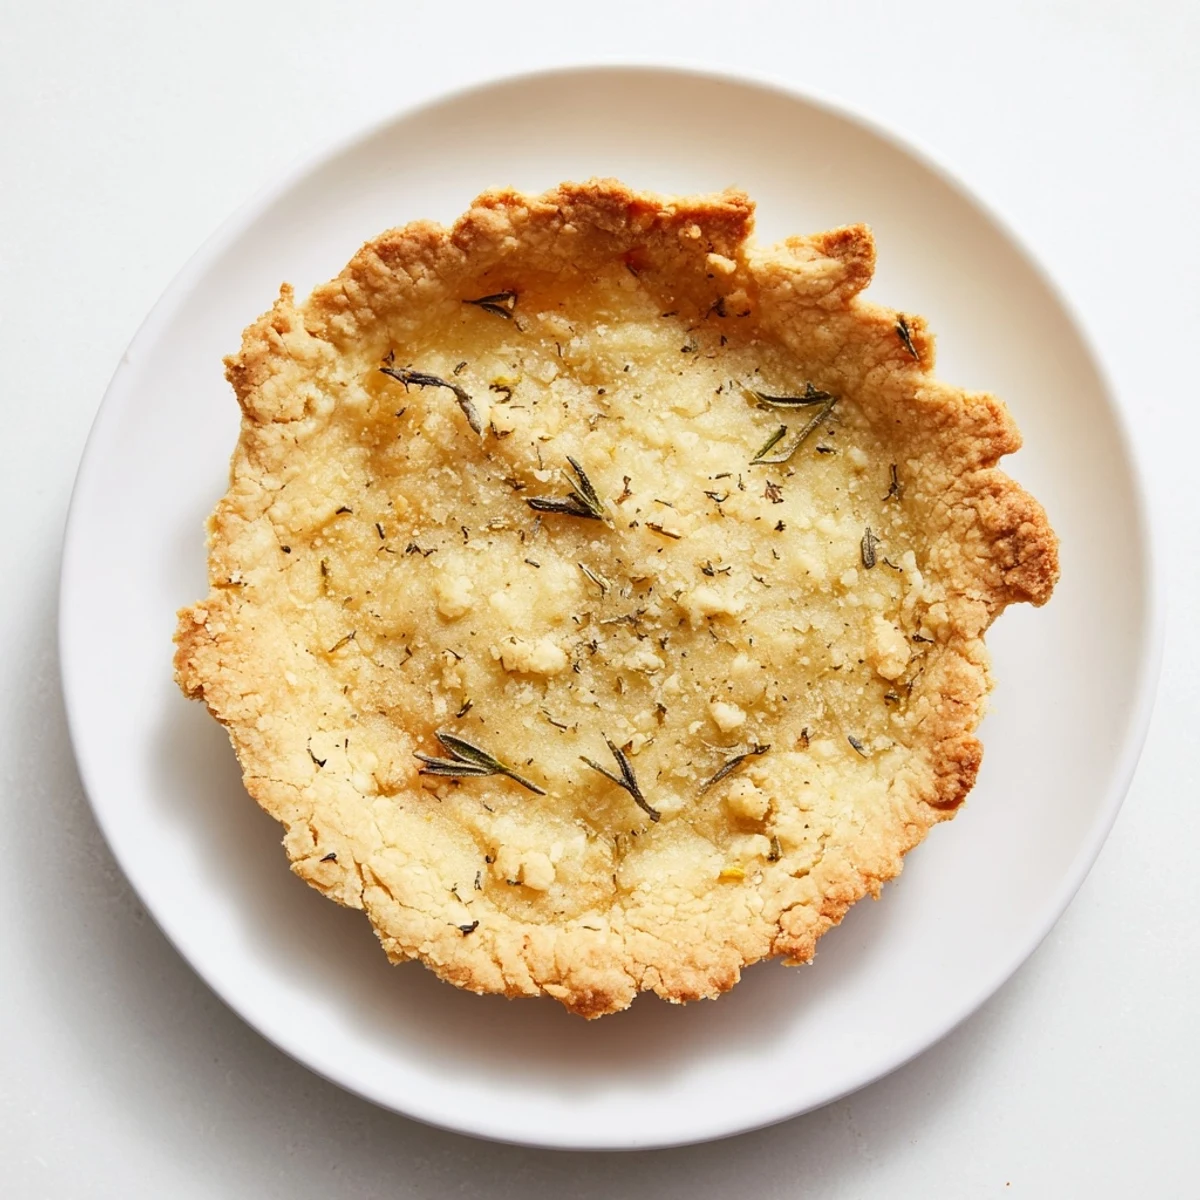
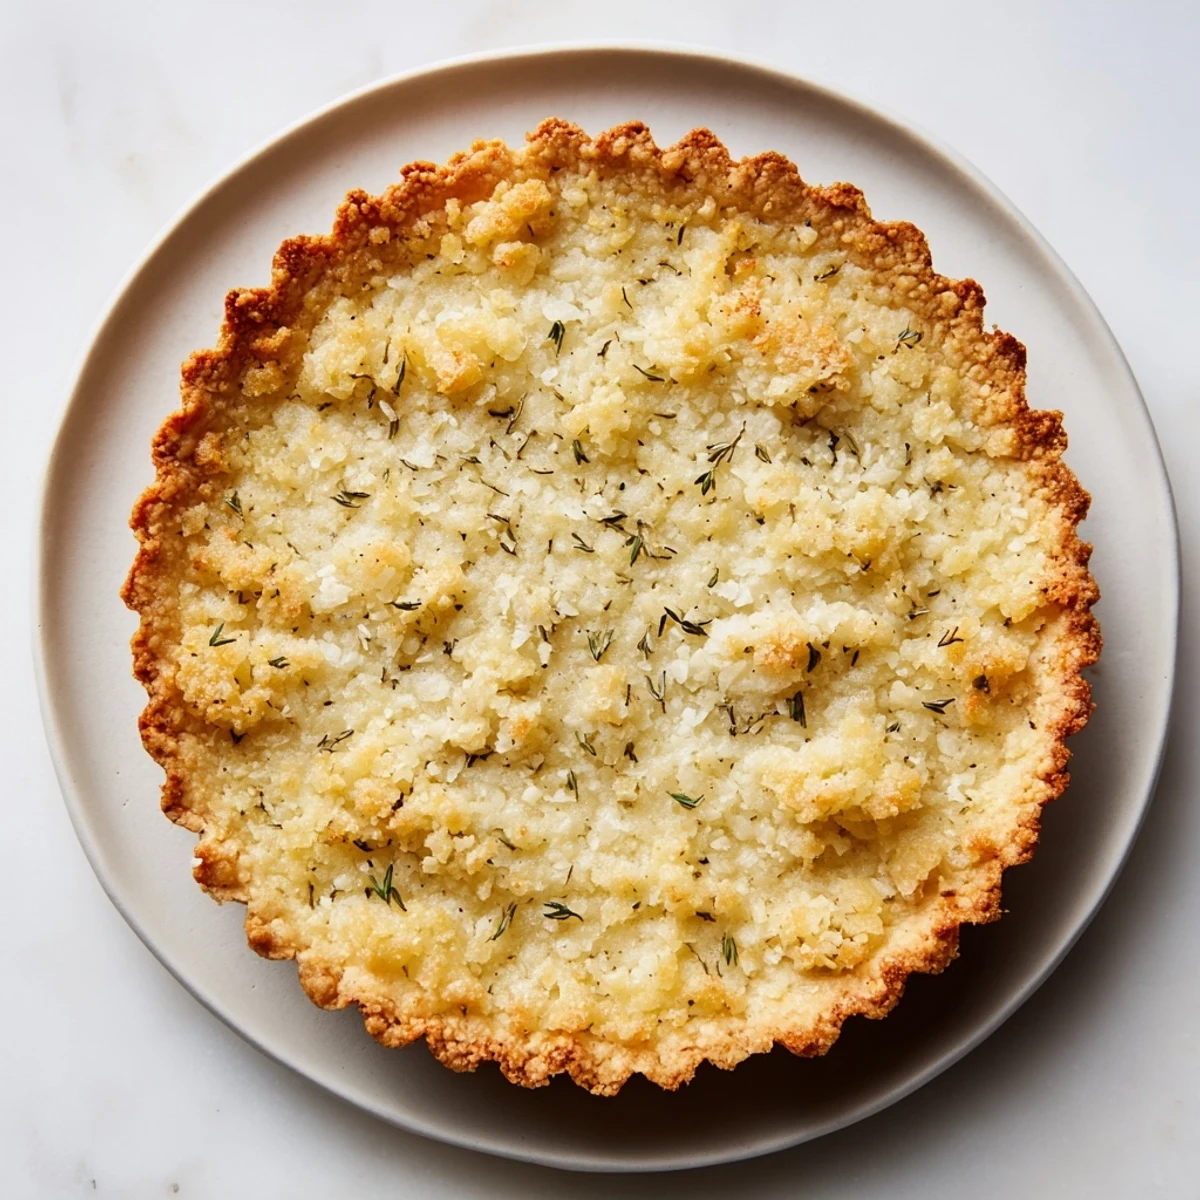
 These delicate tart shells offer a crisp texture with a tender crumb, made from a simple dough blending flour, butter, and egg yolk. Chilling the dough ensures perfect handling and a flaky finish after baking. Optionally, dried herbs or pepper can be added to elevate flavor complexity. Their versatile size suits various savory fillings, from roasted vegetables to cheeses, ideal for sophisticated starters or light main dishes.
The dough’s cold butter incorporation yields a tender yet crisp shell. After chilling and rolling thin, shells are baked blind to maintain shape and crispness. Cooling them fully before filling preserves texture. These tart shells can be prepared ahead and stored briefly, enhancing convenience for entertaining.
I remember the first time I made tart shells from scratch, standing in my tiny apartment kitchen on a rainy Sunday afternoon. My grandmother had always made them look effortless, but I discovered that day that the real magic wasn't in fancy equipment or secret ingredients—it was in understanding how cold butter and flour could transform into something delicate and impossibly crisp. That afternoon changed everything about how I approached pastry, and now these shells are my go-to foundation for every elegant appetizer and main course I serve.
I'll never forget the dinner party where my sister brought store-bought shells and I brought mine fresh from the oven. The difference was undeniable—hers broke under her fork, mine shattered in the most satisfying way, releasing that buttery aroma that made everyone lean in closer. That's when I realized these weren't just shells; they were the opening act that set the tone for the entire meal.
Ingredients
- All-purpose flour (1 1/4 cups / 160 g): This is your foundation, and measuring by weight is worth the extra step because it keeps your dough tender and consistent
- Fine sea salt (1/2 teaspoon): Don't skip this—it highlights the buttery flavor and keeps everything balanced
- Unsalted butter, cold and cubed (1/2 cup / 115 g): This is non-negotiable; cold butter creates those precious little air pockets that make shells shatter beautifully when you bite them
- Large egg yolk (1): The yolk alone keeps things tender and golden without making the dough tough like whole eggs would
- Ice water (2–3 tablespoons): Ice cold, added slowly—warm water is the enemy of a flaky crust
- Dried herbs (1 teaspoon, optional): Thyme, rosemary, or herbes de Provence add whispers of flavor that make people ask what's different about your shells
- Freshly ground black pepper (1/4 teaspoon, optional): A crack of pepper transforms these from plain to memorable
Instructions
- Start with cold ingredients:
- Whisk together your flour, salt, and herbs in a large bowl. This step matters more than you'd think because you're distributing the seasonings evenly, so every bite tastes the same.
- Cut in the butter:
- Add those cold butter cubes and work them into the flour using a pastry blender or your fingertips until it looks like coarse breadcrumbs with some pea-sized butter pieces still visible. This texture is your promise of crispness—those butter bits create steam pockets when baking.
- Bring it together gently:
- Add your egg yolk and 2 tablespoons of ice water, mixing with a fork until the dough just starts to hold together. Resist the urge to knead aggressively; you're being kind to the gluten here, not working it.
- Rest and chill:
- Turn the dough onto a lightly floured surface, knead it just until smooth, flatten it into a disk, wrap it in plastic, and refrigerate for 30 minutes. This cooling period is where patience becomes flavor—the gluten relaxes and the butter solidifies again.
- Prepare for baking:
- Preheat your oven to 375°F (190°C). Roll the chilled dough to about 1/8 inch thick, cut circles, and gently fit them into tartlet pans or a large tart pan, trimming the excess.
- Prevent puffing:
- Prick the bases with a fork, line each shell with parchment paper, and fill with baking beans or pie weights. This keeps them flat and even.
- Blind bake with intention:
- Bake for 15 minutes with the weights in place, then remove them and bake for another 5–7 minutes until golden and crisp. You're looking for that honey-colored finish that means they're fully cooked and ready to hold anything you pour into them.
- Cool completely:
- Let them cool in the pan before filling—this is when they firm up and become impossibly delicate.
 Save to Pinterest
 I once brought these shells to my mother's potluck, filled with roasted vegetables and cream, and watched her take a bite with that polite smile people give to homemade dishes. Then her eyes widened. She asked for the recipe that night, and now she makes them every month for her book club. That moment taught me that good food is really just an excuse to make people feel cared for.
Why Homemade Shells Matter
Store-bought shells are convenient, but homemade ones taste like butter and care in a way that makes guests pause mid-bite. The flavor is cleaner, brighter, and the texture has this delicate crispness that makes each bite feel intentional. When you make them yourself, you control every element—the butter quality, the herbs, the salt level—and that control becomes flavor.
Flavor Variations That Work
These shells are blank canvases waiting for your imagination. I've topped them with caramelized onions and goat cheese, roasted red peppers with anchovy cream, wild mushrooms with fresh thyme, and even a simple mixture of Gruyère and eggs for breakfast. The wonderful thing is that a good shell works with almost any savory filling—the pastry never competes, it just elevates.
Storage and Make-Ahead Magic
These shells are one of my favorite things to make ahead because they actually improve when stored properly. Bake them completely, let them cool, and keep them in an airtight container for up to 2 days. Warmed gently in the oven for a few minutes before filling, they taste almost like you just pulled them out. You can also freeze the unbaked shells in tartlet pans for up to a month and bake them directly from frozen, adding just a few extra minutes to the baking time.
- Make the dough up to 2 days ahead and keep it wrapped in the refrigerator, ready to roll
- Fully baked shells keep for 2 days but freeze beautifully for up to a month
- Always reheat briefly before serving to restore that just-baked crispness
 Save to Pinterest
 These shells have become my secret weapon for making simple ingredients feel special. Every time I pull a fresh batch from the oven, I'm reminded that real elegance comes from understanding technique, not from complicated recipes.
Recipe FAQs
- → How does chilling the dough affect the tart shells?
-
Chilling firms the butter and relaxes gluten strands, resulting in flakier, crisp shells after baking.
- → Can dried herbs be added to the dough?
-
Yes, herbs like thyme or rosemary can be incorporated for aromatic, savory notes.
- → What is the best way to bake tart shells evenly?
-
Baking blind with parchment and weights prevents shrinking and ensures crisp, golden edges.
- → How thick should the dough be rolled?
-
Roll the dough to about 1/8 inch (3 mm) thickness for a delicate, crisp texture.
- → Can these shells be made in advance?
-
Yes, they can be prepared and stored in an airtight container for up to two days without losing crispness.
