 Save to Pinterest
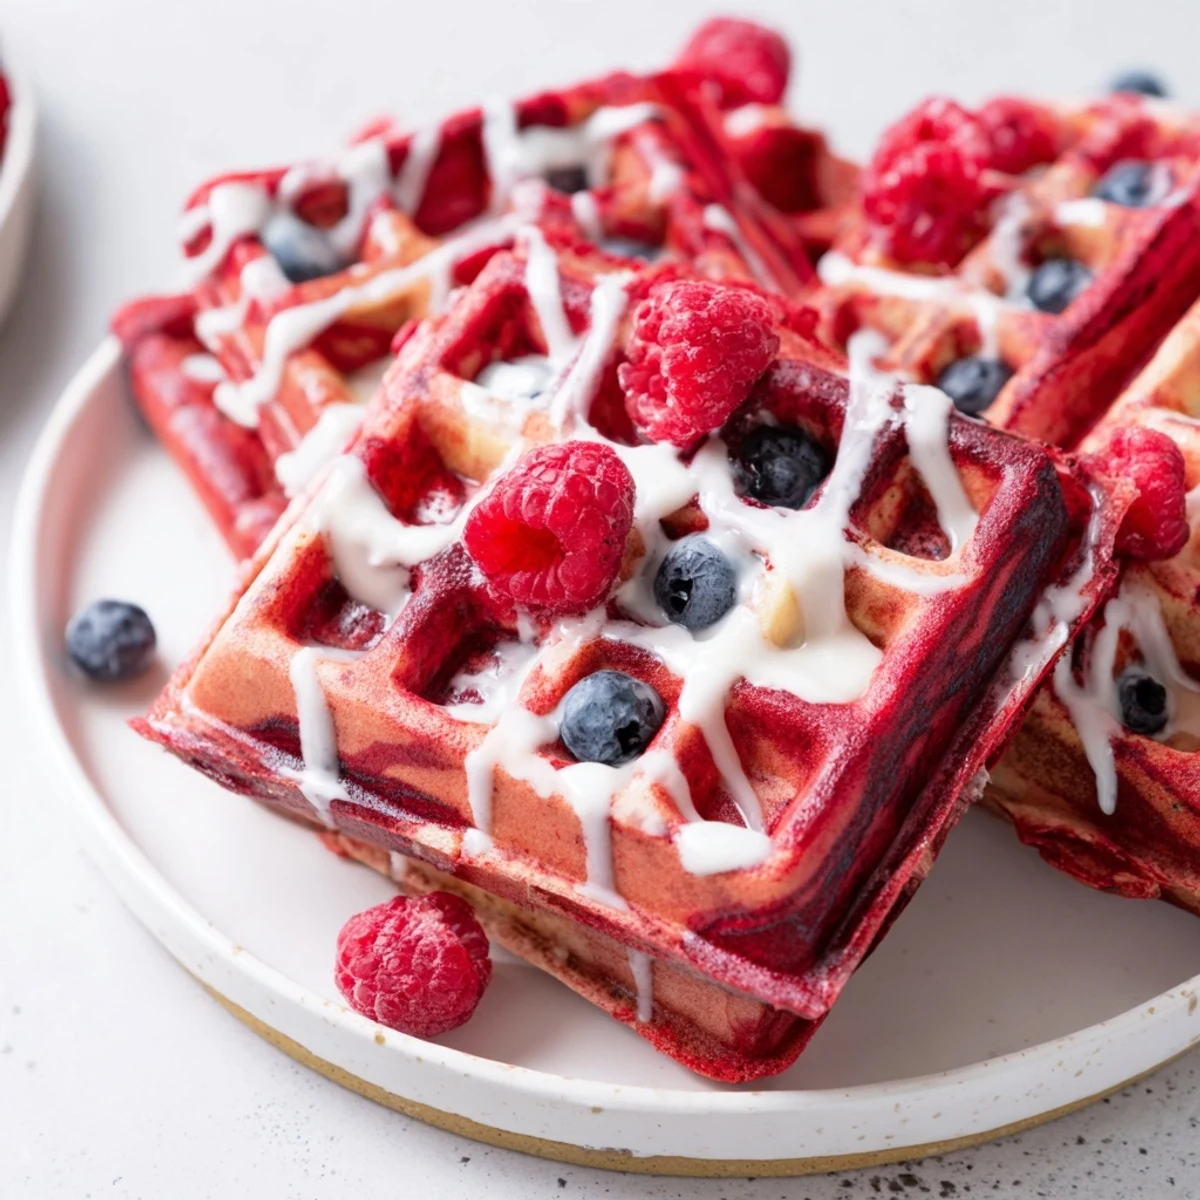
 Transform your brunch table with these eye-catching red velvet marble waffles that combine the best of both worlds. The base vanilla batter provides a classic, fluffy foundation, while the red velvet swirl adds vibrant color and subtle cocoa depth. Creating the marbled effect is simple—just alternate spoonfuls of each batter onto your waffle iron and give them a gentle swirl with a chopstick or knife.
The result is a stunning presentation that tastes as good as it looks. The buttermilk ensures tender, fluffy interiors while the waffle iron creates perfectly crisp edges. These waffles come together in just 30 minutes, making them achievable for weekend breakfasts or special occasions. Top them with cream cheese glaze, fresh berries, or whipped cream for an extra touch of indulgence that will have everyone asking for seconds.
My sister called me at 7am on a Tuesday, breathless about a waffle idea that wouldn't let her sleep. Red velvet, she said, but swirled. Like marble cake, but breakfast. I was halfway to the kitchen before she even finished explaining.
I made these for my cousin's bridal brunch last spring, and the bride actually stopped mid conversation to stare at her plate. Someone asked if I'd stayed up all night perfecting them. I just smiled and passed the syrup.
Ingredients
- 2 cups all-purpose flour: The foundation that gives these waffles their satisfying heft and crisp edges
- 2 tbsp granulated sugar: Just enough sweetness to let the red velvet flavors shine without becoming dessert
- 2 tsp baking powder: This is what creates those beautiful deep pockets that catch every drop of syrup
- 1/2 tsp baking soda: Works with the buttermilk to ensure your waffles rise tall and fluffy
- 1/4 tsp salt: Don't skip this, it's what makes all the flavors pop and taste complete
- 1 3/4 cups buttermilk, room temperature: The tang that makes red velvet taste like red velvet, plus tenderness
- 2 large eggs: Room temperature eggs incorporate better and help create that perfect waffle structure
- 4 tbsp unsalted butter, melted and slightly cooled: Because butter makes everything better, especially waffle edges
- 1 tsp vanilla extract: The vanilla batter half needs to stand up to all that chocolate cocoa power
- 2 tbsp unsweetened cocoa powder: This is what gives the red velvet portion its signature depth
- 1 tbsp red food coloring: Gel coloring gives you that vibrant ruby red without thinning your batter
Instructions
- Whisk your dry foundation:
- In a large bowl, combine flour, sugar, baking powder, baking soda, and salt until everything is evenly distributed
- Blend the wet ingredients:
- In another bowl, whisk buttermilk, eggs, melted butter, and vanilla until you have a smooth, emulsified mixture
- Bring them together gently:
- Fold the wet mixture into the dry ingredients just until combined, some lumps are fine and actually preferable
- Create your two batters:
- Divide the batter evenly between two bowls, then whisk cocoa powder and red food coloring into one bowl
- Heat your canvas:
- Preheat your waffle iron and give it a light coating of oil or nonstick spray
- The marble magic moment:
- Drop alternating spoonfuls of red velvet and vanilla batters onto the hot iron, then swirl gently with a chopstick or butter knife
- Cook to golden perfection:
- Close the lid and let them cook for 3 to 5 minutes until they're crisp and cooked through
- Serve them up:
- Get these to the table while they're still warm, with whatever toppings make your heart sing
 Save to Pinterest
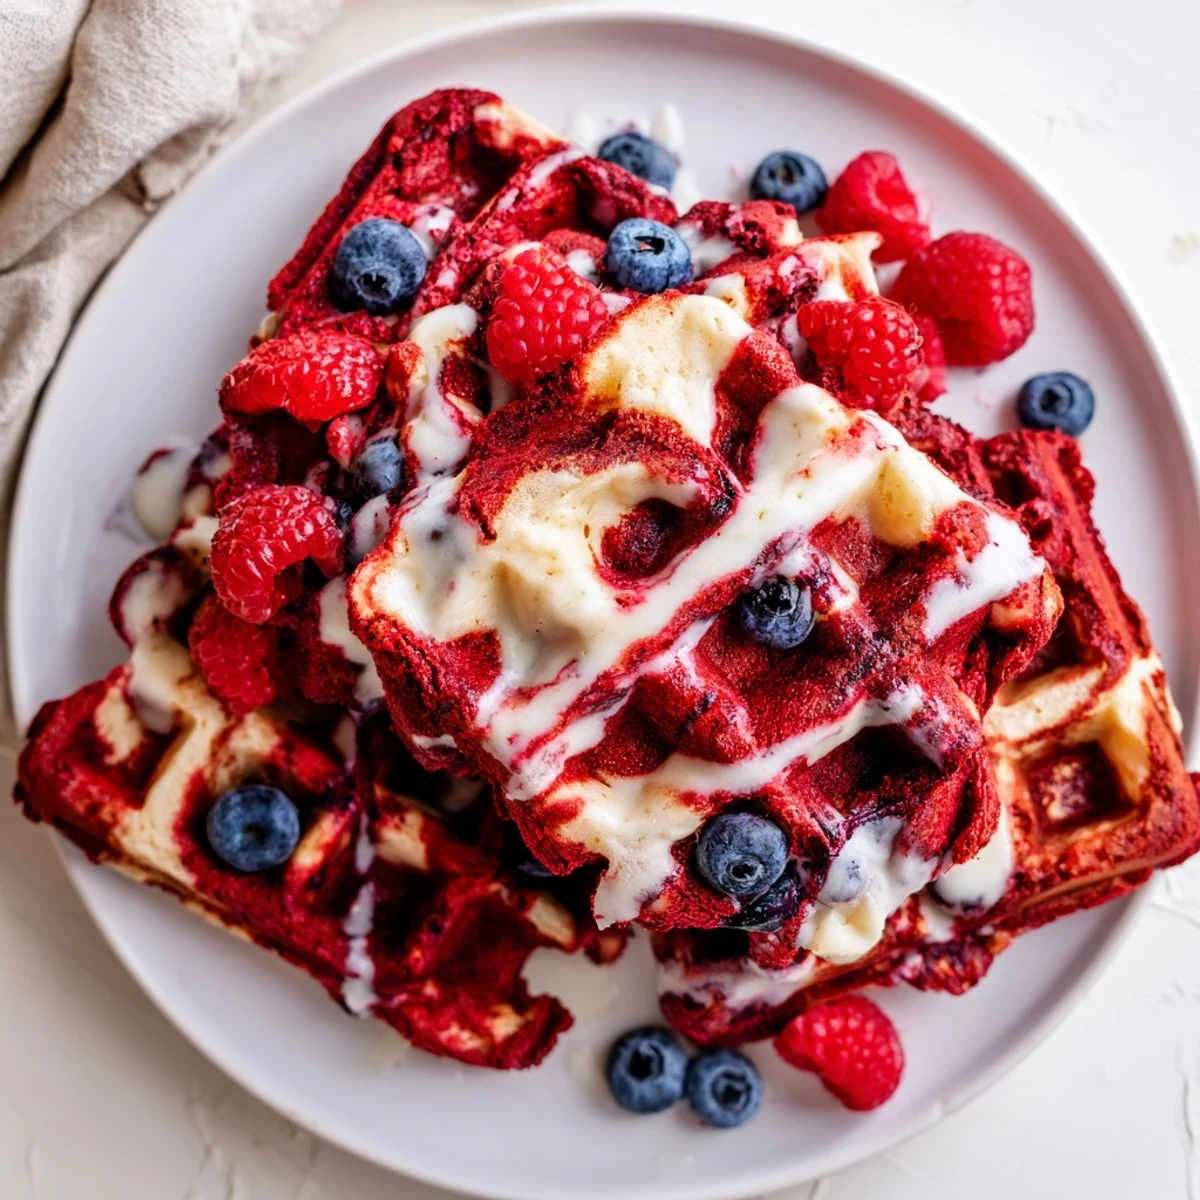
 These became my go to when I need to remind someone that they're worth the extra effort. Food is love, but marbled food is love that took its time getting dressed.
Getting The Marble Effect Right
I learned the hard way that you need both batters to be the same consistency for that perfect marble. If your red velvet batter feels thicker after adding the cocoa, stir in a tablespoon of buttermilk until they match.
Make Ahead Magic
On chaotic mornings, I mix both batters the night before and store them in separate containers. Give them a quick stir in the morning and you're halfway to waffle heaven before the coffee even brews.
Topping Ideas That Work
A cream cheese drizzle feels practically mandatory, but don't stop there. These waffles play beautifully with so many flavors.
- Fresh strawberries macerated in a little sugar
- Toasted pecans for a nice crunch contrast
- A dusting of powdered sugar right before serving
 Save to Pinterest
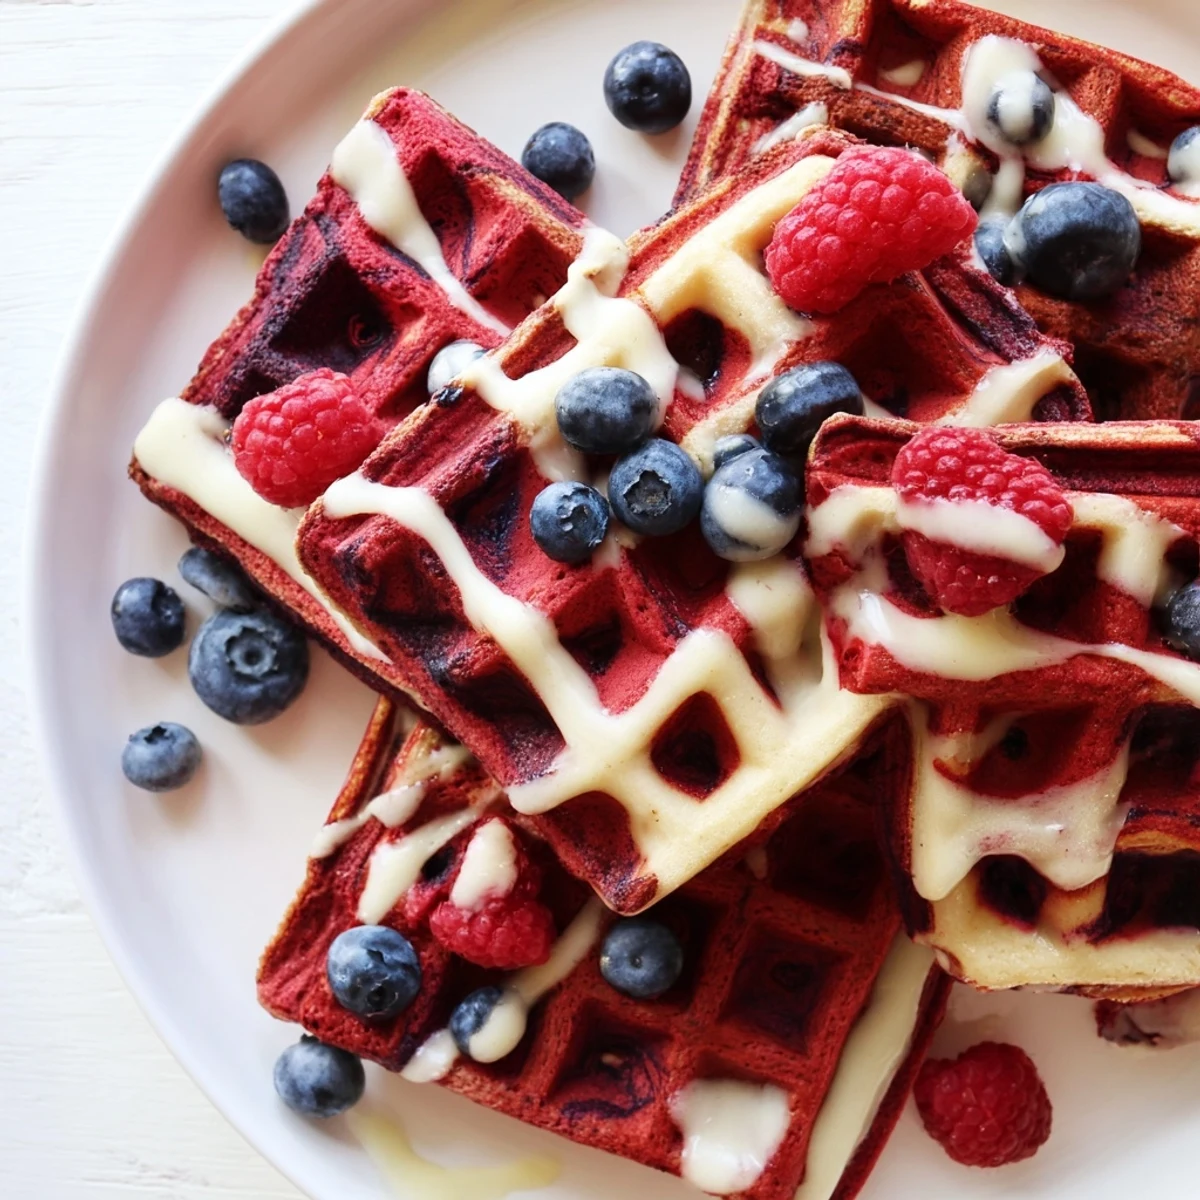
 There's something about cutting into that first waffle and seeing the pattern you created, like edible art you get to eat for breakfast. Enjoy every bite.
Recipe FAQs
- → What makes red velvet waffles different from regular waffles?
-
Red velvet waffles incorporate cocoa powder and food coloring into the batter, creating a distinctive reddish hue and subtle chocolate flavor. When marbled with vanilla batter, you get both the visual appeal of the swirl and the complementary flavors of cocoa and classic vanilla in every bite.
- → How do I achieve the perfect marble swirl effect?
-
The key is alternating spoonfuls of red velvet and vanilla batters onto the waffle iron rather than mixing them together beforehand. Once both batters are dolloped onto the hot iron, use a chopstick, butter knife, or toothpick to gently swirl them together just once or twice—over-swirling will blend the colors too much and lose the marble effect.
- → Can I make these waffles ahead of time?
-
While best served fresh and warm, you can prepare the batter the night before and store it in the refrigerator. Give it a quick stir before using, as it may thicken slightly. Already-cooked waffles can be frozen and reheated in a toaster or oven at 350°F for about 5 minutes to regain crispiness.
- → What can I use if I don't have buttermilk?
-
You can substitute an equal amount of regular milk mixed with 1 tablespoon of vinegar or lemon juice—let it sit for 5 minutes to curdle before using. Greek yogurt thinned with a splash of milk also works well and adds a nice tang that complements the cocoa flavor.
- → Is there a way to make these waffles less sweet?
-
Reduce the granulated sugar in the batter to 1 tablespoon. You can also skip sweet toppings and serve with fresh fruit or a light dusting of powdered sugar. The cocoa and vanilla flavors will still shine through, making them satisfying without being overly sugary.
- → What's the best way to store leftover waffles?
-
Cool leftover waffles completely on a wire rack to prevent sogginess, then store in an airtight container in the refrigerator for up to 3 days. For longer storage, freeze them in a single layer before transferring to a freezer bag. They'll keep frozen for up to 2 months and reheat beautifully.
