 Save to Pinterest
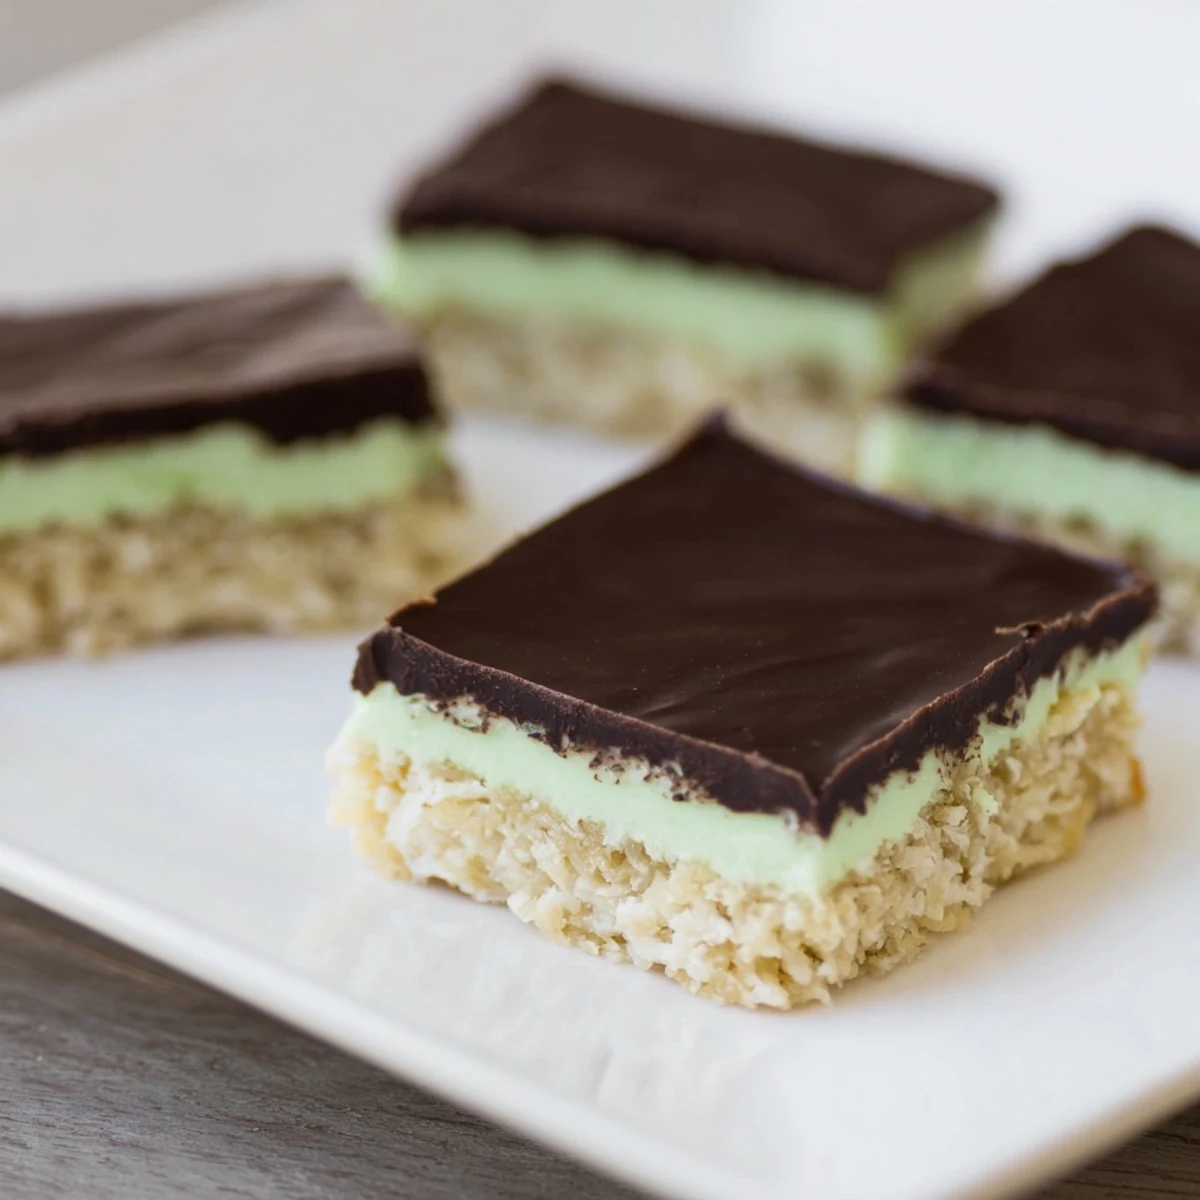
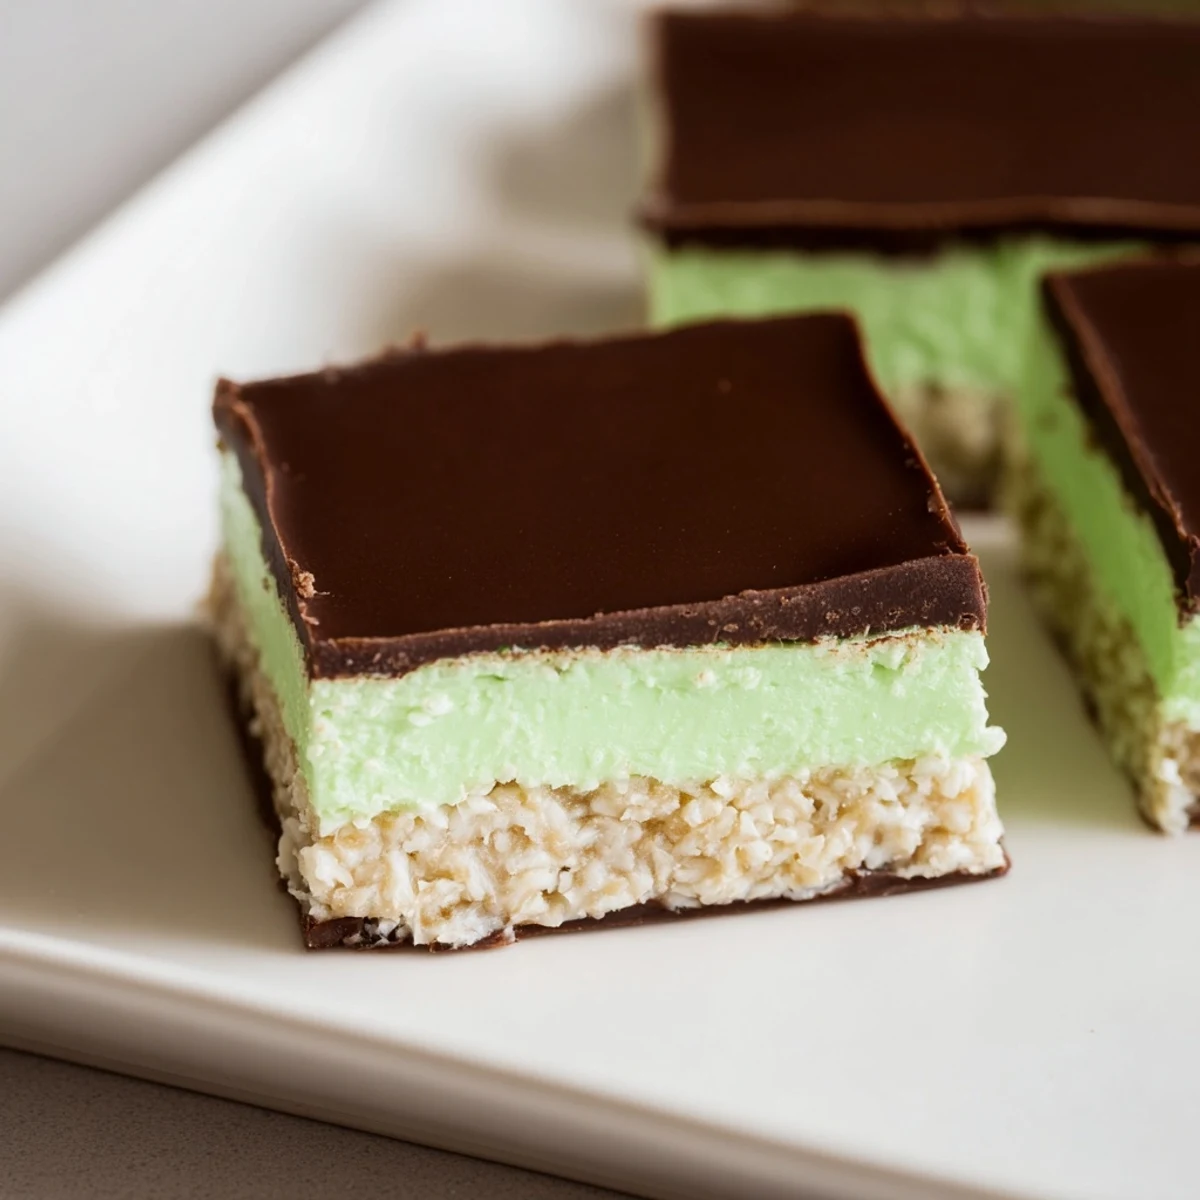
 This no-bake peppermint slice features a crisp biscuit base blended with coconut and condensed milk, layered with a smooth peppermint filling and finished with a glossy dark chocolate topping. The dessert chills for a few hours to set, offering a delightfully balanced mint and chocolate experience. Easy to prepare with minimal cooking, it suits vegetarian diets and serves 16 squares, perfect for sharing at any gathering.
My sister brought these back from a school bake sale once, and I ate three before dinner. The mint hit first, then the chocolate melted on my tongue, and I knew I had to learn how to make them myself.
I made these for a potluck once and watched people take polite bites, then immediately go back for seconds. One friend asked if I bought them from a bakery, which felt better than any compliment.
Ingredients
- Plain sweet biscuits (250 g): Digestive or Graham crackers work beautifully here. I crush them until theyre sandy, not chunky, so the base holds together without crumbling when you cut it.
- Unsalted butter (100 g for base, 2 tbsp for filling, 30 g for topping): Melted butter binds the base, softened butter makes the filling spreadable, and a little in the chocolate keeps it glossy and smooth.
- Desiccated coconut (1/2 cup): Adds a subtle chew to the base. I once forgot it and the texture felt too plain, so now I never skip it.
- Sweetened condensed milk (1/3 cup): This is the glue that holds the base together and adds a hint of caramel sweetness underneath everything.
- Powdered sugar (2 cups): Sift it or youll get lumps in the filling. I learned this the hard way when my first batch looked speckled instead of smooth.
- Milk (2 tbsp): Just enough to loosen the filling so it spreads without tearing the base layer.
- Peppermint extract (1 tsp): A little goes a long way. Too much and it tastes like toothpaste, too little and you lose the magic.
- Green food coloring (optional): I add a few drops because it makes the slice look like the ones from my childhood, but you can skip it if you prefer.
- Dark chocolate (180 g): Chop it finely so it melts evenly. I use a mix of dark and semi sweet for balance, but any chocolate you love will work.
Instructions
- Prepare the tin:
- Line a 20 cm square tin with parchment paper, letting the edges hang over the sides. This makes lifting the whole slab out so much easier when its time to cut.
- Make the base:
- Crush the biscuits into fine crumbs using a food processor or a rolling pin and a bag. Mix them with melted butter, coconut, and condensed milk until it looks like wet sand, then press firmly into the tin.
- Chill the base:
- Pop the tin in the fridge while you make the filling. A cold base helps the peppermint layer stick without sinking in.
- Whip the peppermint filling:
- Beat powdered sugar, softened butter, milk, peppermint extract, and a drop or two of green coloring until its smooth and fluffy. Spread it gently over the chilled base, working from the center outward.
- Set the filling:
- Refrigerate for 20 to 30 minutes until the peppermint layer feels firm to the touch. If you skip this, the chocolate will mix into the mint and ruin the clean layers.
- Melt the chocolate:
- Combine chopped dark chocolate and butter in a bowl over simmering water, stirring until glossy and smooth. You can microwave it in short bursts if youre impatient, but watch it closely.
- Pour and spread:
- Pour the melted chocolate over the peppermint layer, tilting the pan gently to cover every corner. The warmth will help it settle into an even coat.
- Final chill:
- Refrigerate for at least an hour until the chocolate hardens completely. I usually leave mine for two hours just to be safe.
- Slice and serve:
- Run a sharp knife under hot water, wipe it dry, then cut the slab into squares. Clean the knife between cuts for the neatest edges.
 Save to Pinterest
 I keep a tin of these in the fridge during summer because theyre cold, minty, and disappear faster than ice cream. My nephew once called them fancy Thin Mints, and honestly, hes not wrong.
Storing and Serving
These slices live happily in an airtight container in the fridge for up to a week, though theyve never lasted that long in my house. I stack them between sheets of parchment paper so the chocolate doesnt stick, and I always serve them chilled because the filling softens at room temperature.
Swaps and Tweaks
If you want a milder mint flavor, start with half a teaspoon of extract and taste before adding more. You can also swap the dark chocolate for white or milk chocolate, though I find dark cuts through the sweetness best. For a nutty crunch, fold chopped roasted hazelnuts into the base before pressing it into the tin.
What to Serve Alongside
I like pairing these with strong black coffee because the bitterness balances the sweetness, but mint tea works beautifully too if you want to lean into the peppermint vibe. A scoop of vanilla ice cream on the side turns them into a proper dessert, though theyre just as good eaten straight from the fridge at midnight.
- Brew a pot of coffee or tea to cut through the richness.
- Serve with vanilla ice cream if youre feeling indulgent.
- Keep a damp cloth nearby to wipe your fingers between bites, the chocolate melts fast.
 Save to Pinterest
 These slices remind me why I love no bake desserts, all the flavor and none of the fuss. Make a batch, share them if you can, and save at least one square for yourself before they vanish.
Recipe FAQs
- → What kind of biscuits work best for the base?
-
Plain sweet biscuits like Digestive or Graham crackers create a crunchy, flavorful foundation when combined with coconut and condensed milk.
- → How is the peppermint filling prepared?
-
The filling blends powdered sugar, softened butter, milk, peppermint extract, and optional green coloring into a smooth, spreadable mixture.
- → What is the best way to melt the chocolate topping?
-
Melt dark chocolate with butter gently over simmering water or in short bursts in the microwave, stirring until smooth.
- → How long should the slice chill before serving?
-
Chill the base and filling layers for about 20–30 minutes before adding chocolate, then refrigerate for at least 1 hour until fully set.
- → Can any variations be added to the base?
-
Chopped roasted hazelnuts can be mixed into the base for added texture and flavor.
- → Is it possible to substitute the chocolate topping?
-
Yes, white chocolate can be used instead of dark chocolate for a different taste and appearance.
