 Save to Pinterest
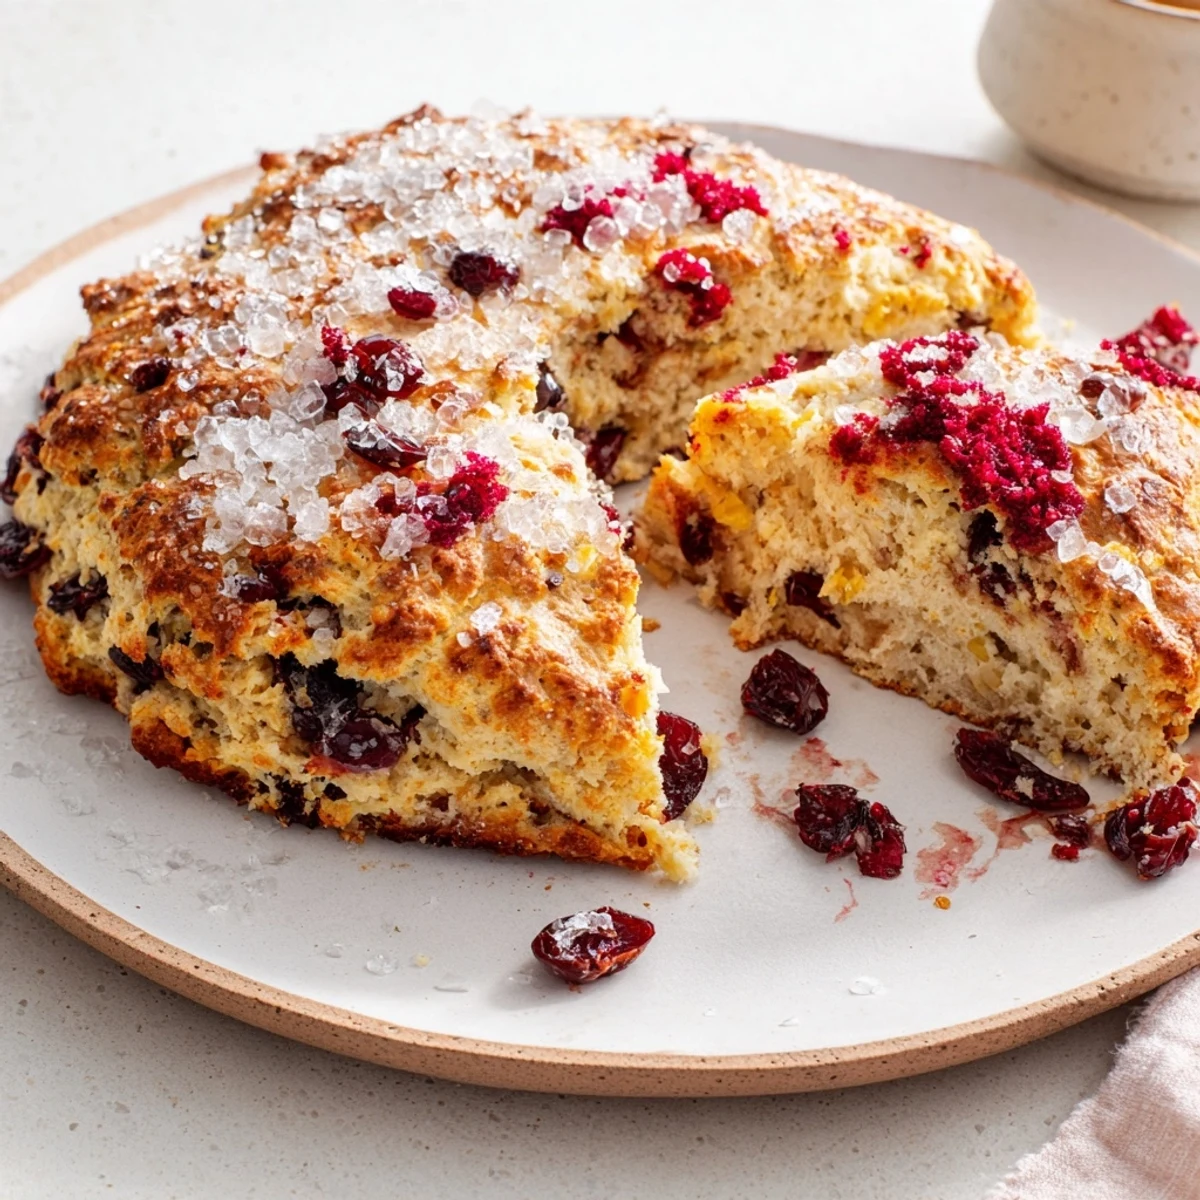
 These tender, buttery scones combine soft, flaky texture with bursts of tart cranberries for a delightful balance of flavors. The dough is made by cutting cold butter into dry ingredients, then gently mixed with cream, egg, and vanilla. Cranberries and optional orange zest add refreshing tartness and aroma. After shaping and brushing with cream, they bake to golden perfection in under 20 minutes. Serve warm, perhaps with butter or clotted cream, ideal for cozy breakfasts or teatime treats.
I discovered the magic of proper scones during a rainy afternoon in a small cottage kitchen outside Edinburgh. My grandmother stood beside me, insisting that the secret wasn't in some fancy technique, but in treating the butter like it was precious and the dough like it was delicate. That first batch emerged golden and tender, and I've been chasing that moment ever since. Now, every time I make cranberry scones, I'm transported back to that kitchen where butter-dusted hands and laughter filled the air.
I remember bringing these to a book club meeting on a chilly October evening, and they disappeared before we'd even opened the book. One friend actually closed her eyes while eating one, and I knew I'd made something worth repeating. That's when these scones became my go-to for sharing moments that matter.
Ingredients
- All-purpose flour (2 cups): This is your foundation, and measuring by weight rather than volume will change everything if you're serious about consistency.
- Granulated sugar (1/3 cup): Just enough sweetness to complement the tartness without overwhelming it; I learned the hard way that too much makes them cloyingly sweet.
- Baking powder (1 tablespoon): This is what gives scones their characteristic lift and tender crumb, so make sure yours isn't old.
- Salt (1/2 teaspoon): A small amount that brightens everything and keeps the sweetness in check.
- Unsalted butter (1/2 cup), cold and cubed: Cold butter is non-negotiable here; it creates those tender layers as it melts during baking, and warm butter will give you dense, tough scones every time.
- Heavy cream (2/3 cup), plus more for brushing: This replaces milk for a richer, more luxurious crumb that feels special.
- Large egg (1): Binds everything together and helps create that golden, shiny top.
- Vanilla extract (1 teaspoon): A subtle background note that enhances without being obvious.
- Fresh or dried cranberries (1 cup): The star ingredient; fresh ones burst with flavor, but dried cranberries offer concentrated tartness if that's what you're after.
- Orange zest (1 tablespoon, optional): A citrus whisper that wakes up the cranberries and adds a sophisticated touch.
- Coarse sugar (2 tablespoons, optional): For topping; it catches the light and adds a delightful crunch that makes them look bakery-worthy.
Instructions
- Prepare your workspace:
- Preheat your oven to 400°F and line your baking sheet with parchment paper. This small step prevents sticking and makes cleanup easier, which matters more than you'd think.
- Build your dry foundation:
- In a large bowl, whisk together your flour, sugar, baking powder, and salt. Take a moment to really incorporate these ingredients; you want them evenly distributed so every scone tastes the same.
- Cut in the butter with intention:
- Add your cold, cubed butter and work it in using a pastry blender or your fingertips until the mixture resembles coarse breadcrumbs. This is the moment where patience pays off; rushing this step results in dense scones. You want visible butter pieces because they create steam pockets that become tender layers.
- Prepare your wet mixture:
- In a separate bowl, whisk together cream, egg, and vanilla extract. Keep this separate until the last moment, as it prevents overmixing once combined.
- Bring it together gently:
- Pour the wet ingredients into the dry ingredients and stir until just combined. And I mean just combined; this is where most people fail by overmixing. A few flour streaks are actually okay here.
- Fold in the star ingredients:
- Gently fold in your cranberries and orange zest. This folding motion, rather than vigorous stirring, keeps the dough tender and the mix even.
- Shape with a light touch:
- Transfer your dough to a floured surface and pat it into a 7-inch circle about 1 inch thick. Imagine you're handling something delicate; your touch should be gentle and confident.
- Cut and arrange:
- Cut the circle into 8 wedges like you're slicing a pie, then place each wedge on your prepared baking sheet with a little space between them. This spacing allows heat to circulate and create those golden, crispy edges.
- Add the finishing touch:
- Brush the tops lightly with cream and sprinkle with coarse sugar if using. This is what makes them look like they came from a proper bakery.
- Bake until golden:
- Bake for 16 to 18 minutes, watching for that deep golden brown color. Your nose will tell you when they're ready before the timer does; that warm, buttery aroma is unmistakable.
- Cool with patience:
- Transfer to a wire rack and let them cool for 10 minutes before serving. This allows the interior to set properly while still being warm enough to enjoy with butter or clotted cream.
 Save to Pinterest
 There was a morning when my daughter stood beside me in the kitchen, watching these scones bake, and asked if we could make them every Sunday. That simple question transformed these from a recipe into a ritual, a reason to slow down together before the week catches us.
Serving and Pairing Ideas
These scones shine brightest when served warm, split open, and topped with creamy clotted cream and a dollop of jam. The tart cranberries mean they pair beautifully with both sweet preserves and savory spreads, so feel free to experiment. I've served them at breakfast with honey and butter, at afternoon tea with lemon curd, and even as a side to soup at lunch. They're remarkably versatile once you realize they're not just a dessert.
Make-Ahead and Storage
One of the best discoveries I made was that scones freeze exceptionally well. You can prepare the dough ahead, freeze it in portions, and bake fresh scones whenever you want that warm, just-made experience. Even baked scones reheat beautifully; wrap them in foil and warm in a 350°F oven for about 5 minutes. This means you can always have bakery-quality scones ready without the morning rush, which has actually made me more likely to sit down and enjoy breakfast properly.
Flavor Variations and Swaps
While cranberry and orange is my favorite combination, this dough is a canvas for variations. Swap the cranberries for blueberries if you want something more subtle, or use dried apricots and almond extract for an entirely different personality. I've learned that the base recipe is flexible, but the technique of keeping everything cold and mixing minimally remains the rule that ensures success every time.
- Lemon zest works beautifully as a substitute for orange zest, creating a brighter, more summery tone.
- If fresh cranberries aren't available, soak dried ones in warm water for five minutes to plump them up and soften their texture.
- Don't skip the coarse sugar topping if you want that bakery appearance and satisfying crunch.
 Save to Pinterest
 These cranberry scones represent everything I love about baking: simple ingredients transformed through technique and care into something that brings people together. Make them warm, share them generously, and enjoy.
Recipe FAQs
- → How do I achieve tender scones?
-
Use cold butter cut into the flour until crumbly to create a flaky texture. Avoid overmixing the dough once wet ingredients are added.
- → Can I use dried cranberries instead of fresh?
-
Yes, dried cranberries work well. For best results, soak them in warm water for about 5 minutes to rehydrate before folding into the dough.
- → What’s the purpose of brushing cream before baking?
-
Brushing cream helps develop a golden, slightly glossy crust and adds richness to the scone’s surface.
- → Can I substitute orange zest with another flavor?
-
Lemon zest is a great alternative, providing a bright citrus aroma that complements the cranberry’s tartness.
- → How should I store leftover scones?
-
Wrap leftover scones tightly and store at room temperature for up to two days, or freeze for longer storage. Reheat before serving.
