 Save to Pinterest
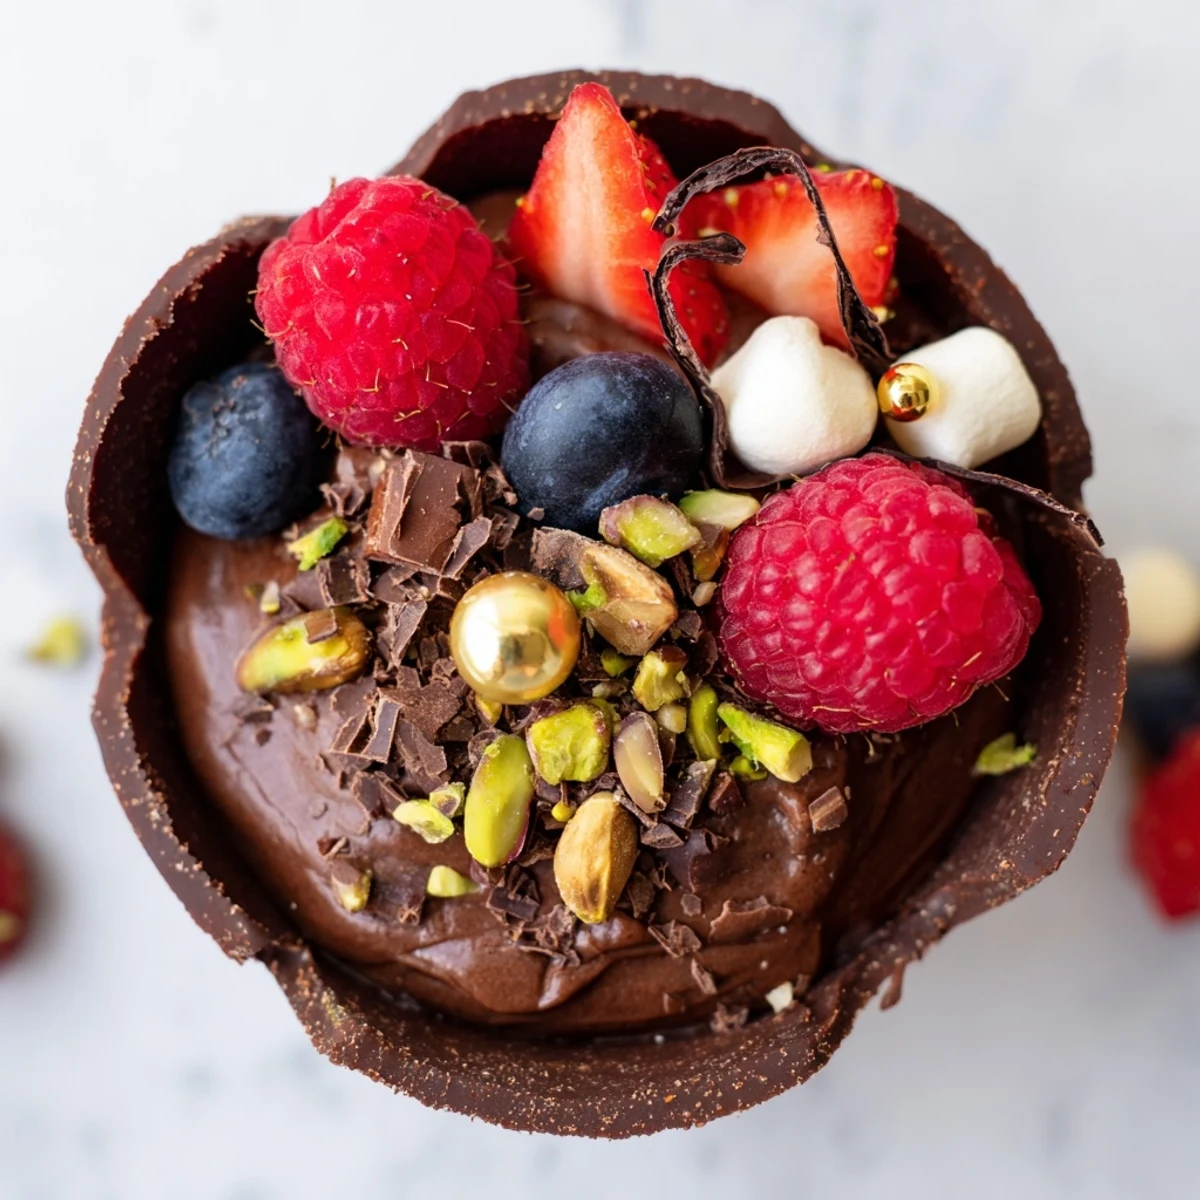
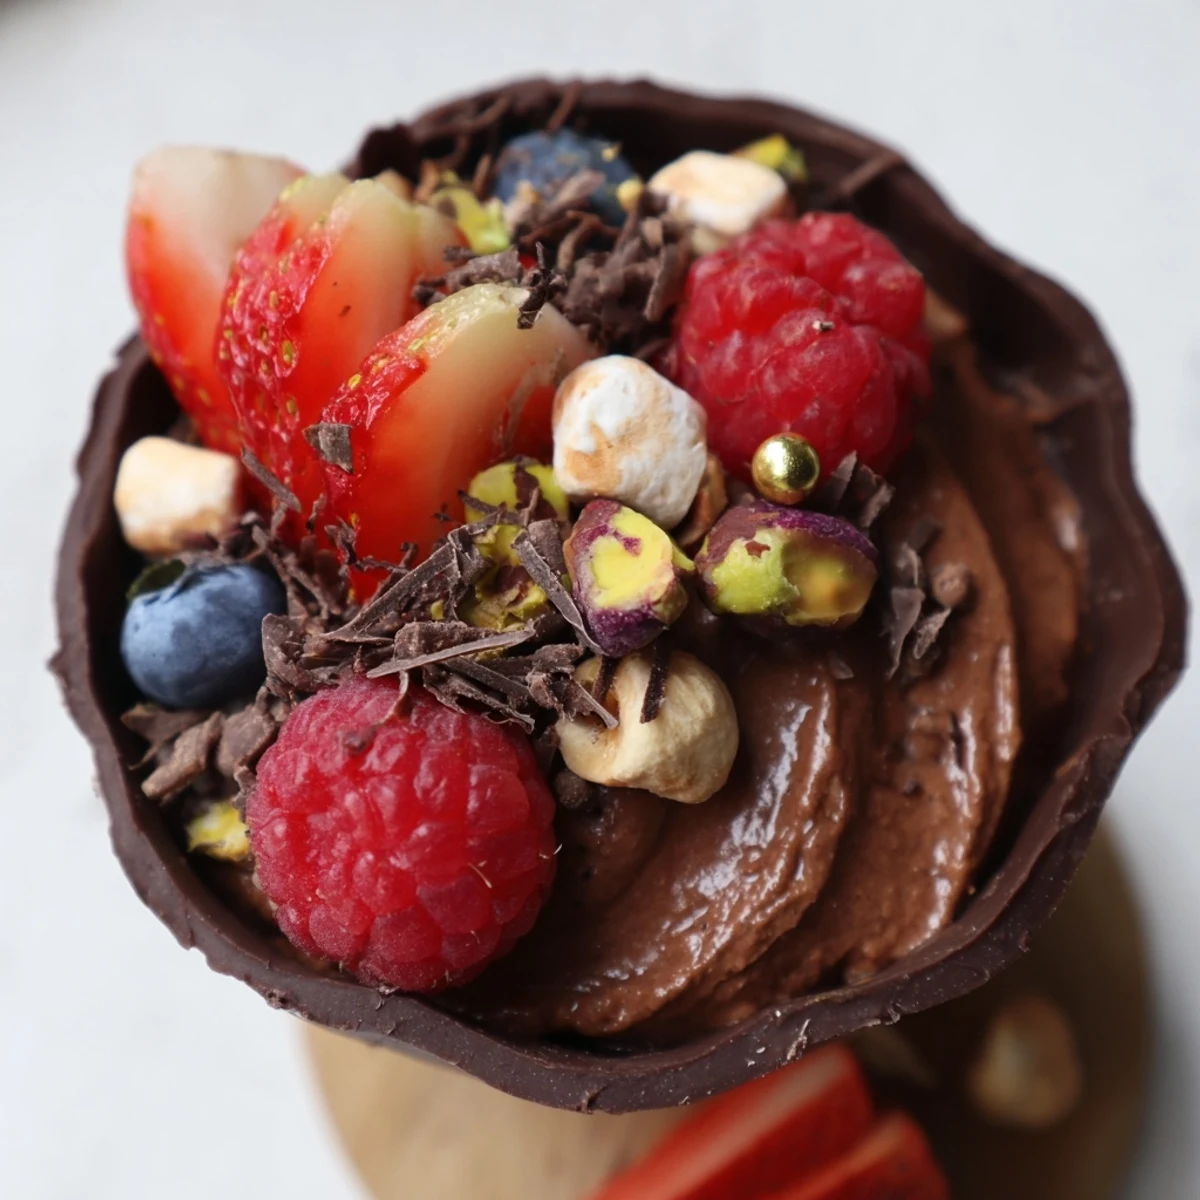
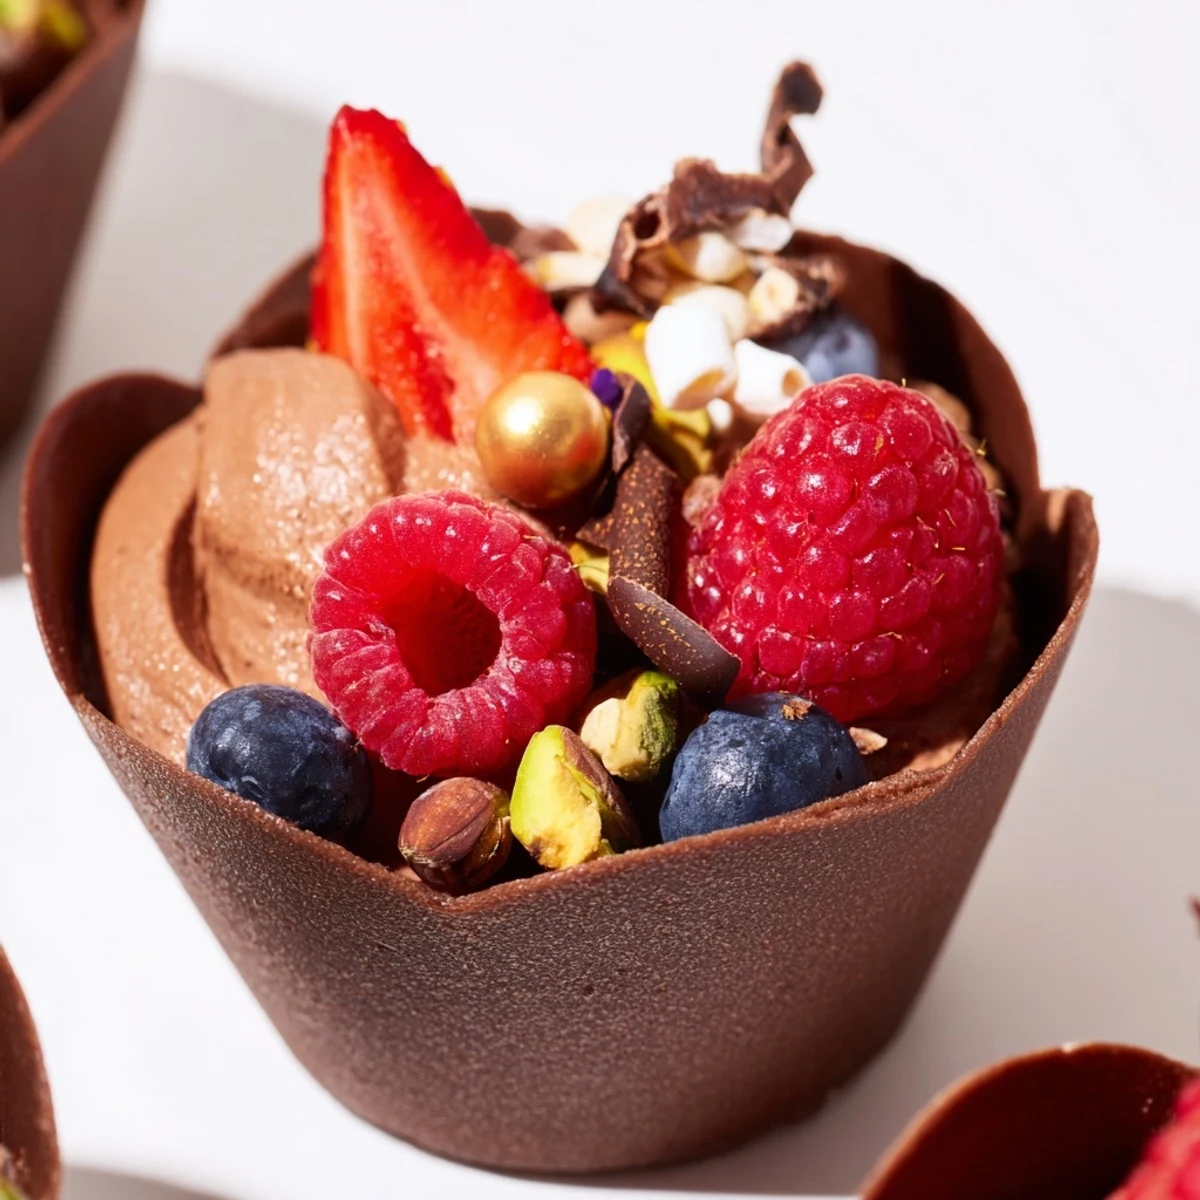
 Create stunning individual dessert cups with handmade dark chocolate shells filled with silky chocolate mousse. These elegant treats feature a perfect balance of textures—smooth creamy mousse meets juicy fresh berries, crunchy nuts, and decorative toppings like mini marshmallows and chocolate curls. The preparation involves melting and molding chocolate cups, whipping a light mousse with heavy cream and vanilla, then artfully arranging toppings for visual appeal. Best assembled the same day for optimal texture, these handheld desserts bring luxury to any gathering with minimal effort.
The first time I attempted chocolate cups, they collapsed into a beautiful disaster. My kitchen smelled like a chocolate shop, and honestly, nobody minded eating the broken evidence with spoons. Now I know better, and these grazing cups have become my go-to when I want to impress without spending hours at the stove.
Last summer, I made these for my best friend's engagement party. Her aunt still texts me asking for the recipe, convinced there's some secret technique involved. There isn't, just melted chocolate and patience.
Ingredients
- 200 g dark chocolate (at least 60% cocoa), chopped: Higher cocoa percentage means your cups will hold their shape better at room temperature
- 200 ml heavy cream: Chill your bowl and whisk for 15 minutes beforehand, it makes whipping noticeably faster
- 100 g dark chocolate, chopped: Let this cool slightly before folding into cream, or you'll end up with chocolate soup
- 2 tbsp powdered sugar: Essential for stabilizing the whipped cream structure
- 1 tsp vanilla extract: Pure extract makes a difference you can taste
- 1 cup fresh mixed berries: Choose whatever looks brightest at the market
- 2 tbsp chopped nuts: Toast them lightly in a dry pan for 3 minutes first
- 2 tbsp mini marshmallows: These add nostalgic sweetness and softness
- 2 tbsp chocolate curls or shavings: Use a vegetable peeler on room temperature chocolate
- 1 tbsp edible gold leaf or pearls (optional): The difference between fancy dessert and showstopper
Instructions
- Create the chocolate cups:
- Melt your chocolate in 30 second bursts, stirring between each one until glossy and smooth. Using upward strokes with your pastry brush, coat the inside of each liner with a generous layer, paying extra attention to the bottom corners where cracks love to form.
- Set the cups:
- Chill the liners for at least 20 minutes, but don't rush this step. When the chocolate is completely firm, gently peel away the liners starting from the top edge, working slowly to avoid any accidental breakage.
- Prepare the mousse base:
- Melt the second batch of chocolate and set it aside to cool while you whip your cream. You want the chocolate warm but not hot, roughly room temperature is perfect.
- Whip the cream:
- In your chilled bowl, beat the heavy cream with powdered sugar and vanilla until soft peaks barely hold their shape. Over-whipping will make folding difficult, so stop just when you think you should.
- Combine mousse:
- Stir one spoonful of whipped cream into the chocolate to lighten it, then gently fold the chocolate mixture back into the remaining cream. The goal is to keep as much air as possible while achieving a uniform color.
- Fill and garnish:
- Spoon or pipe the mousse into each chocolate cup until they're two-thirds full. Arrange berries, nuts, marshmallows, and chocolate curls on top, finishing with edible gold if you're feeling extra fancy.
- Final chill:
- Refrigerate the assembled cups for at least 20 minutes to let everything set properly. They taste best slightly chilled, not ice cold.
 Save to Pinterest
 My daughter now requests these for every birthday instead of cake. She says the berries make them practically healthy, and I'm not about to argue with that logic.
Making Ahead
You can prepare the chocolate cups up to 2 days in advance, stored carefully between layers of parchment paper. The mousse holds up beautifully for 24 hours if kept chilled, but assemble and garnish within 4 hours of serving for the freshest presentation.
Flavor Variations
White chocolate cups filled with dark chocolate mousse create stunning contrast and flavor depth. Infuse your cream with earl grey tea or instant espresso before whipping for sophisticated notes that adults especially love.
Presentation Secrets
Serve these on a wooden board or slate tray with small spoons alongside. Let guests customize their own toppings from small bowls of extras.
- Keep some berries whole and halve others for visual variety
- Alternate garnish patterns so no two cups look identical
- Consider height when piling toppings, you want architectural balance
 Save to Pinterest
 Watch people's faces when they realize the cup itself is chocolate. That moment alone is worth making these.
Recipe FAQs
- → How far in advance can I make these chocolate cups?
-
The chocolate cups and mousse can be prepared separately up to 24 hours in advance, but assembly is best done the same day serving to maintain texture. Store cups in an airtight container at room temperature and keep mousse refrigerated until ready to assemble.
- → Can I use milk or white chocolate instead?
-
Absolutely! Milk or white chocolate work beautifully for both cups and mousse. Note that white chocolate requires more careful melting as it seizes more easily than dark chocolate. The flavor profile will be sweeter and less intense.
- → What other toppings work well with these cups?
-
Consider crushed cookies, toasted coconut flakes, fresh mint leaves, caramel drizzle, sea salt flakes, freeze-dried fruit pieces, or candied citrus peel. Seasonal toppings like pomegranate seeds in winter or peaches in summer add variety.
- → My chocolate cups cracked when removing the liners—what went wrong?
-
Cracking usually happens when chocolate is too cold or the coating is too thin. Ensure your chocolate layer is thick enough (about 3mm) and let it set at cool room temperature rather than freezing. Gently warm the liners with your hands before peeling.
- → How do I transport these without damaging them?
-
Use a rigid container with a lid, placing cups in a single layer. If stacking, insert parchment paper between layers. Keep refrigerated until transport time, then pack with ice packs. Avoid direct sunlight or warm car interiors during transport.
- → Can I make these without silicone liners?
-
You can use small paper cupcake liners, silicone molds, or even create freeform cups by painting melted chocolate onto the inside of inverted bowls. For party presentation, disposable shot glasses work as molds too—simply peel away after chocolate sets.
